ምርት አልቋልview
This CURT Class 3 trailer hitch is designed for the Mercedes-Benz V-Class 220d and Metris W447 models, manufactured from 2015 to the present. It provides a 2-inch (50.8mm) receiver tube, suitable for attaching various towing accessories such as cargo carriers and bicycle racks. The hitch is constructed for durability and includes the necessary bolts for installation.
ማስታወሻ፡- Hitch pin, mount, wiring, and coupler are not included with this product and must be purchased separately.
የደህንነት መረጃ
Always adhere to the vehicle manufacturer's towing capacity and the hitch's specified weight ratings. Overloading can lead to serious injury or damage. Ensure all connections are secure before towing. Regularly inspect the hitch for any signs of wear, damage, or corrosion. Do not modify the hitch in any way. Always wear appropriate safety gear during installation and maintenance.
የጥቅል ይዘቶች
- CURT Trailer Hitch (Model curt-13276)
- Installation Hardware Set (necessary bolts)
ዝርዝሮች
| የሞዴል ቁጥር | curt-13276 |
| የተሽከርካሪ ተኳኋኝነት | Mercedes-Benz V-Class 220d / Metris W447 (2015-Present) |
| የሂች ክፍል | ክፍል 3 |
| የመጎተት አቅም | በግምት 2720 ኪ.ግ (6000 ፓውንድ) |
| አቀባዊ የመጫን አቅም | በግምት 400 ኪ.ግ (880 ፓውንድ) |
| የመቀበያ ቱቦ መጠን | 2 ኢንች / 50.8 ሚሜ |
| Ground Clearance (Hitch Receiver Insertion Port) | Bottom end: 30 cm, Top end: 35 cm |
| Main Body Dimensions (L x W x H) | በግምት 37.6 x 111.9 x 29.8 ሴ.ሜ |
| ዋናው የሰውነት ክብደት | በግምት 22.2 ኪ.ግ |
ማዋቀር እና መጫን
Installation of the CURT trailer hitch requires mechanical aptitude and appropriate tools. It is recommended to have the installation performed by a qualified professional. Refer to the vehicle's service manual for specific instructions regarding bumper removal or frame access, if necessary. Always ensure the vehicle is securely supported before working underneath.
- አዘገጃጀት፥ Park the vehicle on a level surface and engage the parking brake. If required, lift the vehicle using a hoist or jack stands for safe access to the undercarriage.
- Access Vehicle Frame: Depending on your vehicle model, it may be necessary to remove or temporarily lower the exhaust, trim panels, or bumper to access the frame mounting points.
- የመገጣጠሚያ ቦታ አቀማመጥ: Carefully lift the trailer hitch into position, aligning the mounting holes on the hitch with the corresponding holes on the vehicle's frame.
- በሃርድዌር ደህንነቱ የተጠበቀ; Insert the provided bolts and hardware through the aligned holes. Hand-tighten all fasteners to ensure proper alignment.
- የመጨረሻ ማጠንከሪያ; Refer to the specific torque specifications provided in the hitch's included instruction sheet (not provided in this general manual) to tighten all bolts securely. Ensure all connections are firm.
- እንደገና ሰብስብ፡ በመጫን ሂደቱ ወቅት የተወገዱ ወይም የወደቁ ክፍሎችን እንደገና ይጫኑ።

ምስል፡ ፊት ለፊት view of the CURT trailer hitch, showing the main receiver tube and mounting arms.

Image: Diagram indicating the 2-inch receiver tube size with directional arrows.
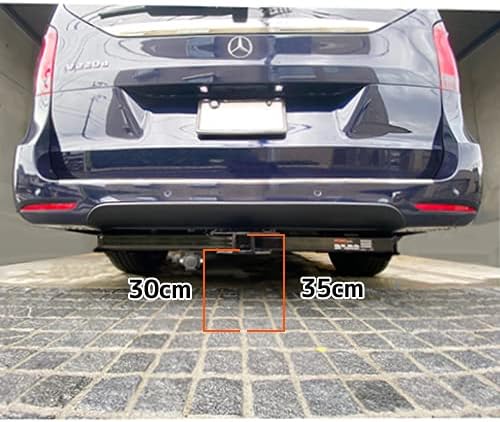
ምስል: የኋላ view of a Mercedes-Benz V-Class with the CURT trailer hitch installed, showing ground clearance measurements of 30cm and 35cm for the hitch receiver.

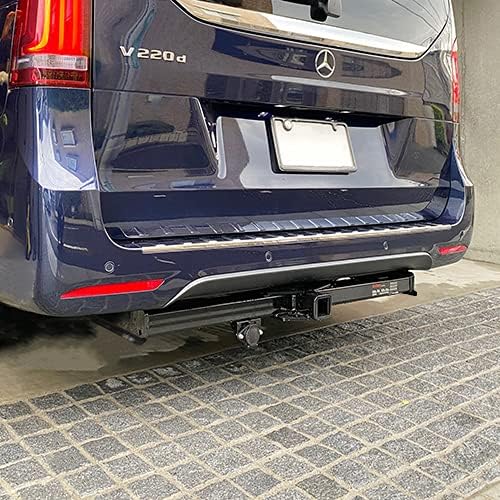
Image: Full rear view of a Mercedes-Benz V-Class with the CURT trailer hitch discreetly installed below the bumper.
ምስል፡ አንግል ያለው የኋላ view of a Mercedes-Benz V-Class, highlighting the installed CURT trailer hitch.
የአሠራር መመሪያዎች
Once the CURT trailer hitch is securely installed, it is ready for use with compatible hitch-mounted accessories.
- መለዋወጫዎችን በማያያዝ ላይ፡ Insert your desired hitch-mounted accessory (e.g., cargo carrier, bike rack) into the 2-inch receiver tube.
- Secure with Pin and Clip: Align the accessory's pinhole with the hitch receiver's pinhole. Insert a hitch pin and secure it with a clip (not included) to prevent the accessory from detaching.
- ግንኙነት አረጋግጥ፡ Before driving, ensure the accessory is firmly seated and secured, with no excessive movement or play.
- የክብደት ስርጭት; Distribute the load evenly on cargo carriers to maintain vehicle stability. Do not exceed the hitch's vertical load capacity or the accessory's weight limit.
ጥገና
ተገቢው ጥገና የCURT ተጎታች መያዣዎ ረጅም ጊዜ እና ደህንነቱ የተጠበቀ አሠራር ያረጋግጣል።
- መደበኛ ምርመራ; Periodically check all bolts and fasteners for tightness. Retighten to specified torque values if necessary.
- የዝገት መከላከያ; Keep the hitch clean and free of dirt, salt, and debris. Apply a rust-inhibiting paint or coating to any exposed metal surfaces to prevent corrosion, especially in harsh environments.
- የመቀበያ ቱቦ እንክብካቤ፡ Keep the inside of the receiver tube clean to ensure easy insertion of accessories. Lubricate with a light grease if needed.
መላ መፈለግ
If you encounter issues with your CURT trailer hitch, consider the following common solutions:
- ልቅ የሆነ መቀርቀሪያ፦ If the hitch feels loose after installation, re-check all mounting bolts and ensure they are tightened to the manufacturer's specifications.
- መለዋወጫዎችን ለማስገባት አስቸጋሪነት; Ensure the receiver tube is clean and free of obstructions. Check for any deformation of the receiver tube or the accessory shank.
- ያልተለመዱ ድምፆች; Investigate any rattling or clunking sounds during operation. This may indicate loose connections or an improperly secured accessory.
- Reduced Towing Performance: Verify that the total weight of your trailer or cargo does not exceed the hitch's or your vehicle's rated capacity.
ዋስትና እና ድጋፍ
This CURT trailer hitch comes with a manufacturer's warranty. For specific warranty terms, conditions, and duration, please refer to the documentation included with your product or contact CURT customer support directly. For technical assistance or compatibility inquiries, please visit the official CURT webጣቢያ ወይም የደንበኞች አገልግሎት ክፍልን ያነጋግሩ።
አምራች፡ CURT
የሞዴል ቁጥር፡- curt-13276
ASIN: B0765SWPC1