
1. መግቢያ
Welcome to the HyperX Armada 25 Gaming Monitor user manual. This document provides essential information for setting up, operating, maintaining, and troubleshooting your new monitor. The HyperX Armada 25 is designed for competitive gaming, featuring a 24.5-inch Full HD (1920x1080) IPS panel, a 240Hz refresh rate, and a 1ms response time, ensuring smooth and responsive visuals. It also includes NVIDIA G-SYNC compatibility to eliminate screen tearing and minimize input latency. A desk mount is included for convenient setup and to maximize desk space.
ቁልፍ ባህሪዎች
- ሁሉም-በአንድ ጥቅል Includes an ergonomic arm and desk mount for easy setup and space-saving.
- ከፍተኛ የማደስ ፍጥነት እና የምላሽ ጊዜ፦ 240Hz refresh rate and 1ms response time for ultra-smooth gaming.
- Vibrant IPS Panel: 24.5-inch Full HD (1920x1080) IPS panel delivers stunning visuals with accurate colors and wide viewing ማዕዘኖች.
- ከNVIDIA G-SYNC ጋር ተኳሃኝ፡ Eliminates screen tearing and reduces stuttering for a fluid gaming experience.

ይፋዊ የምርት ቪዲዮ፡-
2. ማዋቀር
This section guides you through the initial setup of your HyperX Armada 25 Gaming Monitor, including assembly and connection to your computer.
2.1. Assembling the Desk Mount
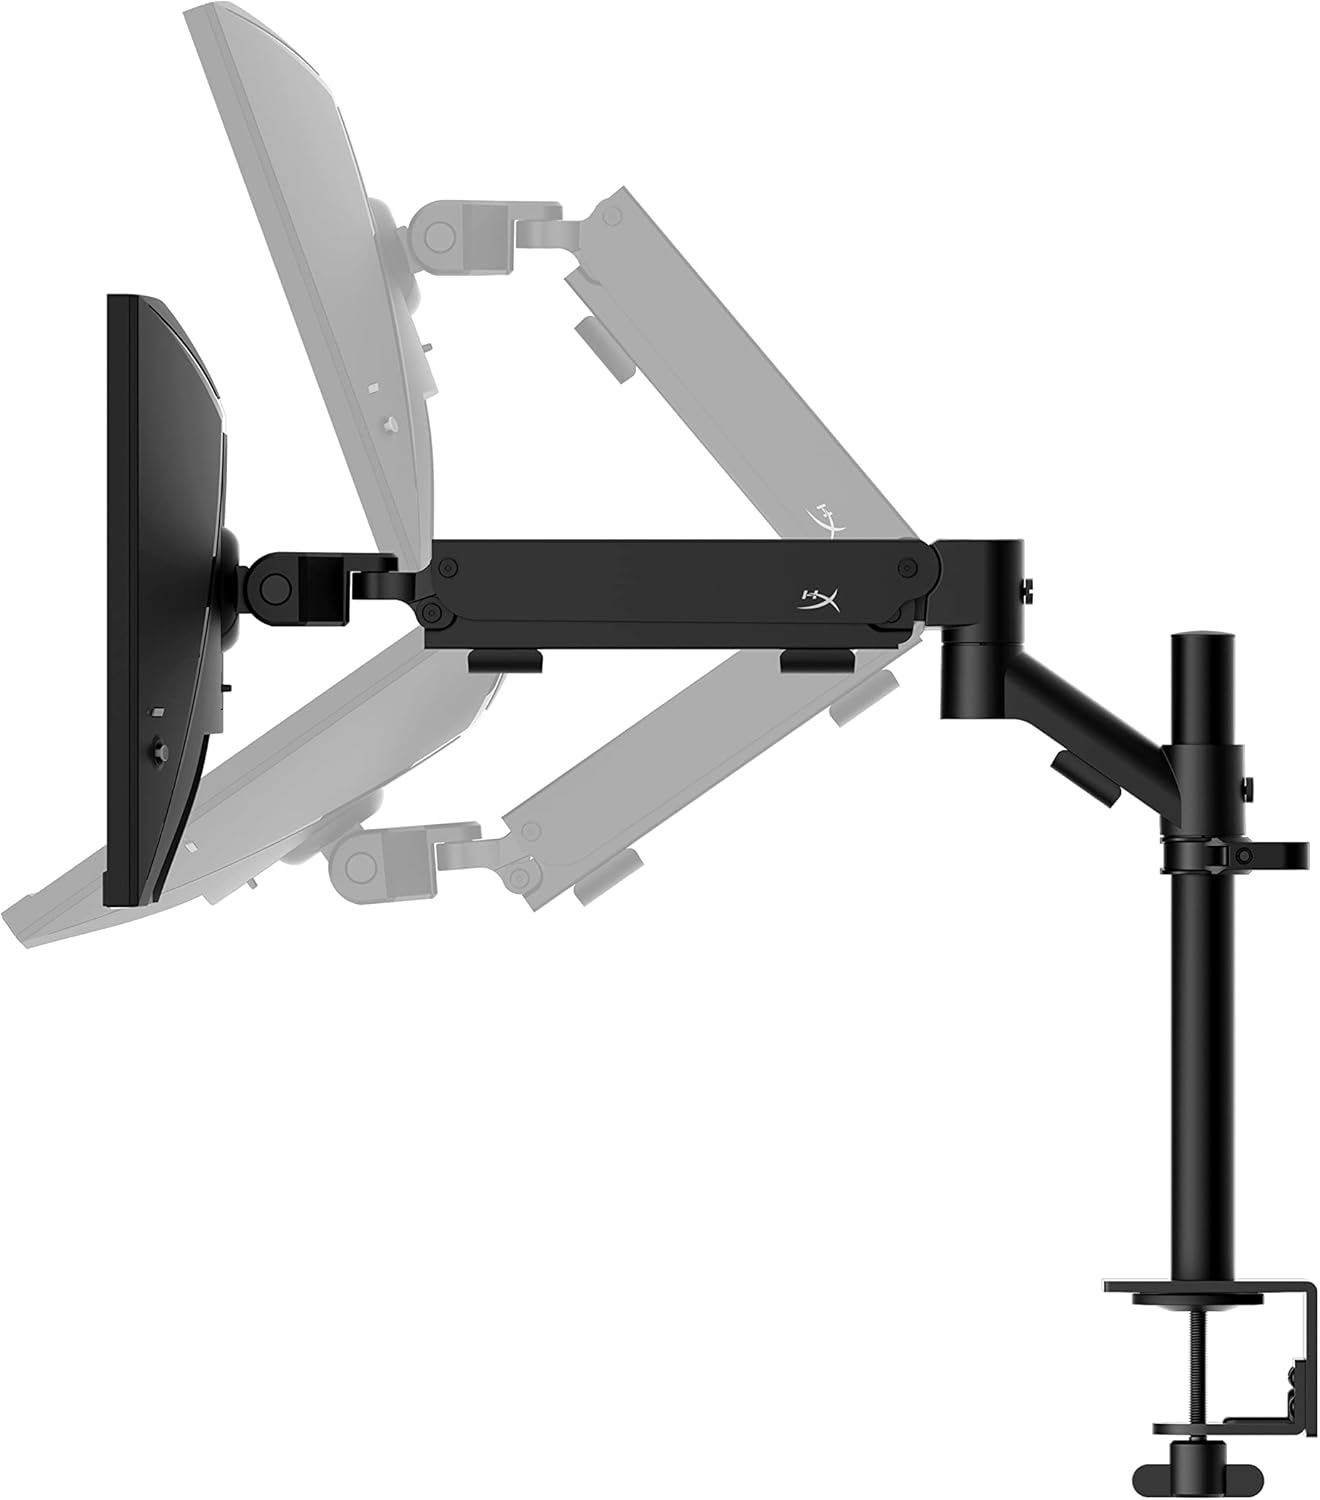
The HyperX Armada 25 comes with an integrated ergonomic desk mount. Follow the instructions provided in the separate quick start guide for detailed assembly steps. The monitor head easily snaps into the arm, allowing for quick and secure installation.

2.2. ተቆጣጣሪውን ማገናኘት
Connect the monitor to your computer using the appropriate cables. The HyperX Armada 25 supports both HDMI and DisplayPort connections.
- የኤችዲኤምአይ ወይም የማሳያ ዲስኦርት ገመዱን አንድ ጫፍ በኮምፒውተርዎ ግራፊክስ ካርድ ላይ ካለው ተጓዳኝ ወደብ ጋር ያገናኙ።
- Connect the other end of the cable to an available HDMI 2.0 or DisplayPort 1.4 port on the back of your monitor.
- Connect the power cord to the monitor and then to a power outlet.
- እሱን ለማብራት በተቆጣጣሪው ላይ ያለውን የኃይል ቁልፍ ተጫን።

3. ሞኒተሩን መስራት
This section covers basic operation and navigation of the monitor's On-Screen Display (OSD) menu.
3.1. በስክሪን ላይ ማሳያ (OSD) አሰሳ
The OSD menu is controlled using a joystick located on the back of the monitor. This joystick allows you to power on/off the monitor and navigate through various settings.
- ጆይስቲክን ይጫኑ፦ የ OSD ሜኑ ለመክፈት ወይም ምርጫን ለማረጋገጥ።
- ጆይስቲክን ወደ ላይ/ወደታች/ግራ/ቀኝ ያንቀሳቅሱ፡ To navigate through menu options and adjust settings.
- Hold the joystick: To power off the monitor.

3.2. የመቆጣጠሪያውን አቀማመጥ ማስተካከል
The ergonomic desk mount allows for flexible positioning of your monitor. You can adjust the height, tilt, swivel, and pivot to find your optimal viewአንግል።

4. ጥገና
Proper maintenance ensures the longevity and optimal performance of your HyperX Armada 25 Gaming Monitor.
- ማያ ገጹን ማጽዳት; ለስላሳ፣ ከቆሸሸ ነፃ የሆነ ጨርቅ በትንሹ ተጠቀም መampened with water or a specialized screen cleaner. Avoid using harsh chemicals, abrasive materials, or direct spraying onto the screen.
- ሲን ማጽዳትasing: ማሳያውን ይጥረጉ ሐasing ለስላሳ እና ደረቅ ጨርቅ.
- የአየር ማናፈሻ; ከመጠን በላይ ሙቀትን ለመከላከል የመቆጣጠሪያው የአየር ማናፈሻ ክፍተቶች አለመዘጋታቸውን ያረጋግጡ።
- ጥቅም ላይ በማይውልበት ጊዜ ማብራት; ኃይልን ለመቆጠብ እና ዕድሜውን ለማራዘም ለረጅም ጊዜ አገልግሎት በማይሰጥበት ጊዜ መቆጣጠሪያውን ያጥፉ።
5. መላ መፈለግ
If you encounter issues with your monitor, refer to the following common troubleshooting steps.
- ኃይል የለም፡
- የኤሌትሪክ ገመዱ ከሁለቱም ሞኒተሪው እና ከኃይል ማመንጫው ጋር ደህንነቱ በተጠበቀ ሁኔታ መገናኘቱን ያረጋግጡ።
- የኃይል መውጫው በትክክል እየሰራ መሆኑን ያረጋግጡ።
- በመቆጣጠሪያው ላይ የኃይል አዝራሩን ይጫኑ.
- ምንም ምልክት የለም፡
- የኤችዲኤምአይ ወይም የማሳያ ዲስኦርት ገመድ ከሞኒተሩም ሆነ ከኮምፒዩተርዎ ጋር ደህንነቱ በተጠበቀ ሁኔታ መገናኘቱን ያረጋግጡ።
- ኮምፒውተርዎ መብራቱን እና በእንቅልፍ ሁነታ ላይ አለመሆኑን ያረጋግጡ።
- የ OSD ምናሌን በመጠቀም ትክክለኛውን የግቤት ምንጭ ይምረጡ።
- Flickering Screen or Image Issues:
- Check the display cable for damage or loose connections.
- የግራፊክስ ካርድ ነጂዎችዎ ወቅታዊ መሆናቸውን ያረጋግጡ።
- በኮምፒዩተርዎ የማሳያ ቅንጅቶች ውስጥ የማደስ መጠኑን ያስተካክሉ።
- If G-SYNC is enabled, try disabling it temporarily to see if the issue persists.
- Buttons Not Responding (OSD Joystick):
- ማሳያው መብራቱን ያረጋግጡ።
- Try restarting the monitor by unplugging and replugging the power cable.
- Clean around the joystick to ensure no debris is obstructing its movement.
6. ዝርዝሮች
Detailed technical specifications for the HyperX Armada 25 Gaming Monitor.
| ባህሪ | ዝርዝር |
|---|---|
| የምርት ልኬቶች | 21.94 x 25.79 x 31.12 ኢንች; 16.98 ፓውንድ £ |
| የንጥል ሞዴል ቁጥር | HyperX Armada 25 |
| የመጀመሪያ ቀን ይገኛል። | ኦገስት 24፣ 2022 |
| አምራች | HP Inc. |
| ASIN | B0B2C1G356 |
| የማሳያ መጠን | ባለ 24.5-ኢንች ሰያፍ |
| ጥራት | ኤፍኤችዲ (1920x1080) |
| የማደስ ደረጃ | 240Hz |
| የፓነል ዓይነት | IPS ፓነል |
| የምላሽ ጊዜ | 1 ሚሴ |
| የማመሳሰል ቴክኖሎጂ | NVIDIA® G-SYNC® ተኳሃኝ |
| Included Mount | Desk Mount Included |
| ግንኙነት | HDMI and Display Port |
7. ዋስትና እና ድጋፍ
For warranty information, technical support, or to access additional resources, please visit the official HyperX webጣቢያ ወይም የደንበኛ አገልግሎታቸውን ያነጋግሩ።
- ኦፊሴላዊ ሃይፐርኤክስ Webጣቢያ፡ www.hyperx.com
- የምርት ድጋፍ ገጽ፡ Refer to the support section on the HyperX webጣቢያ ለእርስዎ የተለየ ሞዴል።