1. መግቢያ
The Walfront MPPT Solar Charge Controller is designed to efficiently manage power flow from your solar panels to your battery bank, optimizing charging performance for off-grid solar systems. This manual provides essential information for the safe and effective installation, operation, and maintenance of your 50A MPPT solar charge controller.

Image 1.1: Walfront MPPT Solar Charge Controller 50A. This image shows the front view of the orange and black controller, featuring an LCD screen displaying PV, Battery, and Load information, along with 'ESC' and 'SET' buttons.
2. ቁልፍ ባህሪያት
- High Efficiency MPPT Tracking: Features MPPT tracking efficiency greater than 99% and a maximum conversion efficiency of up to 98%, maximizing energy harvest from solar panels.
- Wide 180V PV Input and Auto Voltage Recognition: Supports a maximum solar input voltage of 180V (at 25℃) and automatically recognizes 12V, 24V, 36V, and 48V battery systems. Compatible with battery voltages ከ 9V እስከ 64V.
- Clear LCD Display and Smart Protection: Built-in LCD provides real-time system data (voltage, current, operating status). Includes temperature compensation and multiple protection features for safe operation.
- Low No-Load Loss and Reliable Performance: No-load loss of ≤0.4W conserves energy. Designed for reliable operation in temperatures from -10℃ to 65℃ and altitudes up to 3000 meters.
- ለመጫን እና ለመጠቀም ቀላል; Auto-recognition feature simplifies setup. Compact design allows for straightforward mounting.

ምስል 2.1፡ አውቶማቲክ ጥራዝtage Identification. This image highlights the controller's ability to automatically identify 12V, 24V, 36V, and 48V systems, shown with various solar panel application exampሌስ.
3. የደህንነት መረጃ
Please read all instructions carefully before installation and operation. Failure to follow these safety guidelines may result in personal injury, damage to the controller, or other equipment.
- Ensure all wiring is correctly polarized and securely connected. Loose connections can cause overheating and damage.
- ባትሪውን መጀመሪያ ያገናኙ፣ ከዚያም የፀሐይ ፓነልን እና በመጨረሻም ጭነቱን ያገናኙ። በተገላቢጦሽ ቅደም ተከተል ግንኙነቱን ያቋርጡ።
- Do not connect the solar panel array to the controller without a battery connected.
- የስርዓቱን ጥራዝ ያረጋግጡtage of the solar panel and battery are compatible with the controller's specifications.
- መቆጣጠሪያውን በደንብ በሚተነፍሰው ቦታ ላይ ይጫኑ, ከሚቃጠሉ ቁሳቁሶች እና በቀጥታ የፀሐይ ብርሃን.
- Avoid touching live terminals. Use insulated tools during installation.
- This device is not waterproof. Protect it from moisture and water exposure.
4. የጥቅል ይዘቶች
ከዚህ በታች የተዘረዘሩት ሁሉም እቃዎች በጥቅልዎ ውስጥ መካተታቸውን ያረጋግጡ፡-
- 1 x Walfront MPPT Solar Charge Controller (50A)
- 4 x ዊቶች
- 4 x የማስፋፊያ ብሎኖች
- 1 x የተጠቃሚ መመሪያ (ይህ ሰነድ)
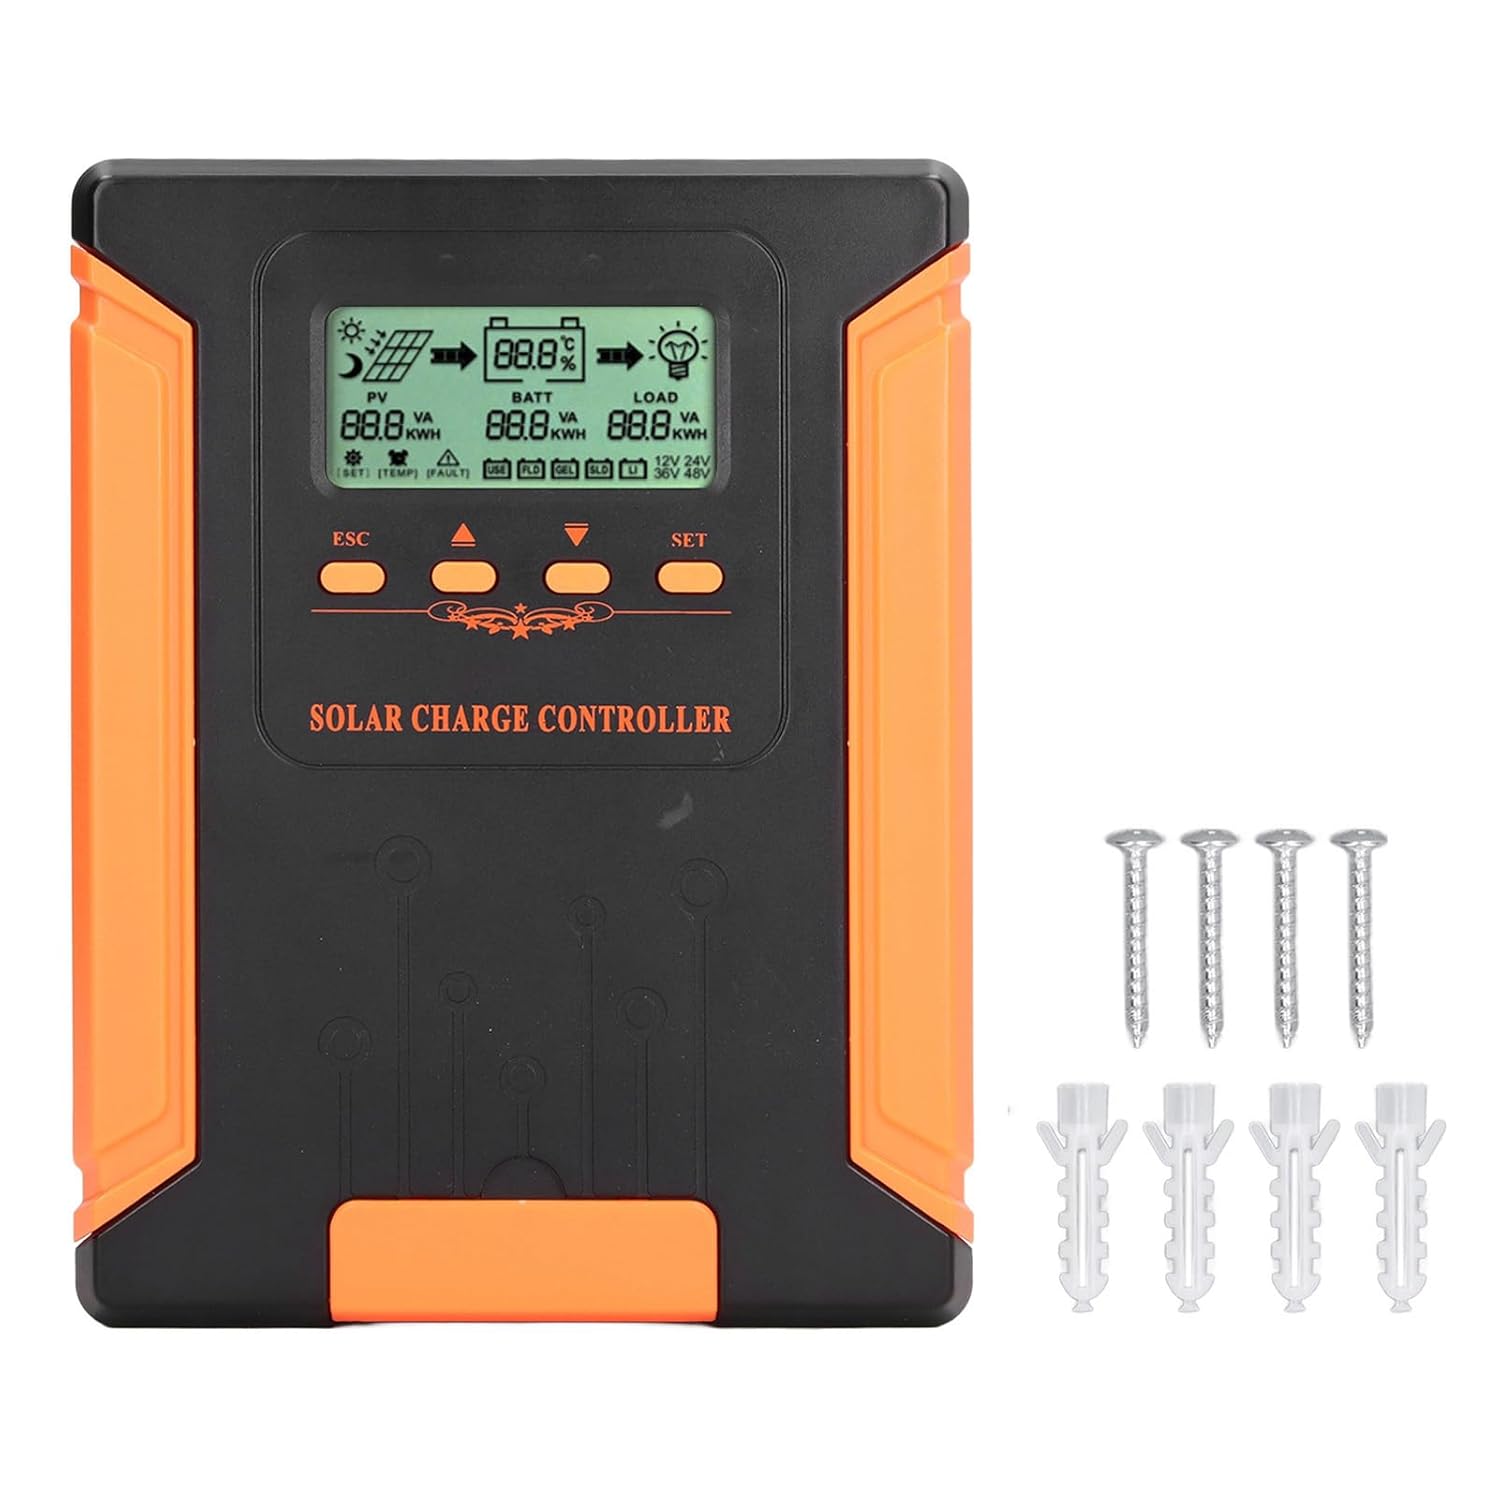
Image 4.1: Package Contents. This image displays the solar charge controller alongside the mounting screws and expansion screws provided in the package.
5. ማዋቀር እና መጫን
Follow these steps for proper installation of your solar charge controller.
5.1 መቆጣጠሪያውን መትከል
- ደረቅ፣ በደንብ አየር የሚያስገባ፣ ከፀሐይ ብርሃን፣ ከከፍተኛ ሙቀት እና ከእርጥበት የተጠበቀ ቦታ ይምረጡ።
- Ensure there is sufficient space around the controller for heat dissipation, especially around the cooling fins.
- Mount the controller vertically on a solid surface using the provided screws.
5.2 የወልና ግንኙነቶች
Refer to the wiring diagrams below for correct connection sequence. Always connect in the following order:
- ባትሪውን ያገናኙ; ባትሪውን ከመቆጣጠሪያው የባትሪ ተርሚናሎች ጋር ያገናኙ። ትክክለኛውን የፖላራይቲ (+ ወደ + እና - ወደ -) ያረጋግጡ። መቆጣጠሪያው የባትሪውን መጠን በራስ-ሰር ይለየዋል።tage.
- የፀሐይ ፓነልን ያገናኙ; Connect the solar panel array to the controller's PV terminals. Ensure correct polarity.
- የዲሲ ጭነትን ያገናኙ (አማራጭ) Connect the DC load to the controller's load terminals. Ensure correct polarity.
To disconnect the system, follow the reverse order: disconnect load, then solar panel, then battery.

Image 5.1: Basic System Connection Diagram. This diagram illustrates the connection order: 1. Battery Assembly, 2. Solar Panel Assembly, 3. DC Load. It also shows an AC Load and Inverter connected to the Battery Assembly.

Image 5.2: Detailed System Wiring Diagram. This diagram provides a more comprehensive view of a solar power system, including solar panels, battery, inverter (AC Output/Input), and various AC loads like laptops, lights, air conditioners, televisions, and fans.
6. የአሠራር መመሪያዎች
The controller features an LCD display and control buttons for monitoring and configuration.
6.1 ኤል.ሲ.ዲ ማሳያ
The LCD screen provides real-time information about your solar system, including:
- PV (Photovoltaic) Status: የግቤት ጥራዝtage, current, and power from solar panels.
- BATT (Battery) Status: የባትሪ ጥራዝtage, charging current, and state of charge.
- LOAD Status: Output current and power to the DC load.
- ስርዓት ጥራዝtage: Automatically detected battery system voltagኢ (12V/24V/36V/48V)።
- የስህተት አመልካቾች፡- Displays fault codes or warnings if issues occur.
6.2 የመቆጣጠሪያ አዝራሮች
The controller has three buttons: ESC, Up/Down arrows, and SET.
- ESC አዝራር፡- Used to exit current menu or cancel an operation.
- የላይ/ታች አዝራሮች Used to navigate through menu options or adjust parameter values.
- አዘጋጅ አዝራር ፦ Used to enter a menu, confirm a selection, or save changes to parameters.

Image 6.1: Control Buttons. This close-up image shows the 'ESC', 'Up arrow', 'Down arrow', and 'SET' buttons on the controller's front panel.
7. ጥገና
መደበኛ ጥገና የፀሐይ ኃይል መሙያ መቆጣጠሪያዎ ጥሩ አፈጻጸም እና ረጅም ጊዜ እንዲቆይ ያረጋግጣል።
- ማጽዳት፡ Periodically clean the controller's exterior with a dry cloth. Ensure the cooling fins are free from dust and debris to maintain proper heat dissipation.
- ግንኙነቶች፡ Check all wiring connections regularly to ensure they are tight and free from corrosion.
- ምርመራ፡- Inspect the controller for any signs of physical damage, overheating, or unusual odors.
- አካባቢ፡ Ensure the installation environment remains dry and well-ventilated.

Image 7.1: Cooling Fins. This close-up shows the cooling fins on the top of the controller, which are crucial for heat dissipation and require regular cleaning.
8. መላ መፈለግ
If you encounter issues with your controller, refer to the following common problems and solutions:
| ችግር | ሊሆን የሚችል ምክንያት | መፍትሄ |
|---|---|---|
| የመቆጣጠሪያ ማሳያ ጠፍቷል | No battery connected or battery voltagበጣም ዝቅተኛ. | Ensure battery is connected correctly and has sufficient charge (above 9V). |
| No charging current from PV | Solar panels not connected, insufficient sunlight, or PV polarity reversed. | የ PV ግንኙነቶችን እና ፖላራይቲውን ያረጋግጡ። በቂ የፀሐይ ብርሃን ያረጋግጡ። የ PV መጠንን ያረጋግጡ።tagሠ ክልል ውስጥ ነው። |
| ጭነት እየሰራ አይደለም | Load disconnected, load current too high, or load polarity reversed. | Check load connections and polarity. Ensure load current does not exceed controller's rating. |
| ባትሪ ሙሉ በሙሉ አልተሞላም | Insufficient solar input, undersized solar array, or battery issues. | Increase solar panel capacity or check for shading. Inspect battery health. |
9. ቴክኒካዊ ዝርዝሮች
Below are the technical specifications for the Walfront MPPT Solar Charge Controller 50A.
| መለኪያ | ዝርዝር መግለጫ |
|---|---|
| ስርዓት ጥራዝtage | 12V / 24V / 36V / 48V Auto |
| ወቅታዊ ክፍያ መሙላት | 50 ኤ |
| No Load Loss | ≤0.4 ዋ |
| Solar Maximum Input Voltage | 180V (at 25℃), 150V (at -25℃) |
| ባትሪ ቁtagሠ ክልል | 9-64 ቪ |
| ከፍተኛው የኃይል ነጥብ ጥራዝtagሠ ክልል | ባትሪ ቁtagሠ +2 ቪ እስከ 150 ቪ |
| የልወጣ ውጤታማነት | ≤98% |
| MPPT የመከታተያ ውጤታማነት | > 99% |
| የሙቀት ማካካሻ Coefficient | -2mv/℃/2V (default value) |
| የሥራ ሙቀት | -10 ℃ እስከ 65 ℃ |
| የጥበቃ ደረጃ | IP21 |
| ከፍታ | ≤3000 Meter / 9842.5ft |

Image 9.1: Model Comparison Table. This table provides a comparison of rated charging current and solar panel maximum input power for CM-50 (50A) and CM-60 (60A) models across different system voltagኢ.
10. ዋስትና እና ድጋፍ
የዋስትና መረጃ እና የቴክኒክ ድጋፍ ለማግኘት፣ በግዢው ጊዜ የቀረቡትን ሰነዶች ይመልከቱ ወይም ቸርቻሪዎን ያነጋግሩ። የግዢ ደረሰኝዎን እንደ ግዢ ማረጋገጫ ያስቀምጡ።