
1. መግቢያ
ስለገዙ እናመሰግናለንasing the CLAYMORE Heady3 CLC-500 Headlight. This versatile headlight is designed for various outdoor activities, offering multiple lighting modes, a motion sensor, and flexible mounting options. Please read this manual carefully before use to ensure proper operation and maintenance.
2. የደህንነት መረጃ
- የዓይን ጉዳትን ለማስወገድ በቀጥታ ወደ ብርሃን ጨረር አይመልከቱ።
- Keep the device away from water and moisture unless specifically designed for waterproof use (check specifications).
- Do not attempt to disassemble or modify the headlight. This may void the warranty and pose safety risks.
- የተገለጸውን የኃይል መሙያ ጥራዝ ብቻ ይጠቀሙtage (USB 5V 1A).
- ልጆች በማይደርሱበት ቦታ ያስቀምጡ.
- ከፍተኛ ሙቀትን እና የፀሐይ ብርሃንን በቀጥታ ያስወግዱ.
3. የጥቅል ይዘቶች
እባክዎ ሁሉም እቃዎች መኖራቸውን ያረጋግጡ፡-
- CLAYMORE Heady3 CLC-500 Headlight
- የዩኤስቢ-ሲ ኃይል መሙያ ገመድ
- የጭንቅላት ማሰሪያ
- የተጠቃሚ መመሪያ (ይህ ሰነድ)
4. ምርት አብቅቷልview
Familiarize yourself with the components of your CLAYMORE Heady3 CLC-500 Headlight.
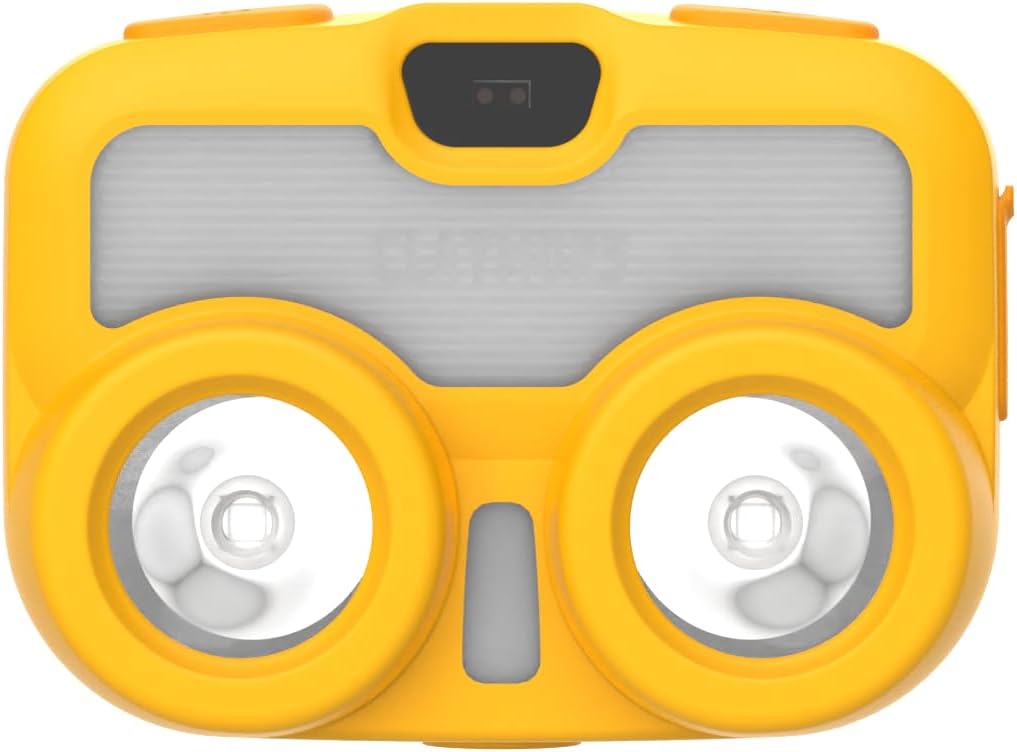
ምስል 4.1: የፊት View. This image shows the front of the CLAYMORE Heady3 CLC-500 Headlight, highlighting the two main light sources and the central sensor area.

ምስል 4.2: ከፍተኛ View. This image displays the top side of the headlight, featuring the power button (left), the P-SENSOR label, and the mode/motion sensor button (right).

ምስል 4.3: ጎን View. This image illustrates the side of the headlight, clearly showing the USB-C charging port with its protective cover.
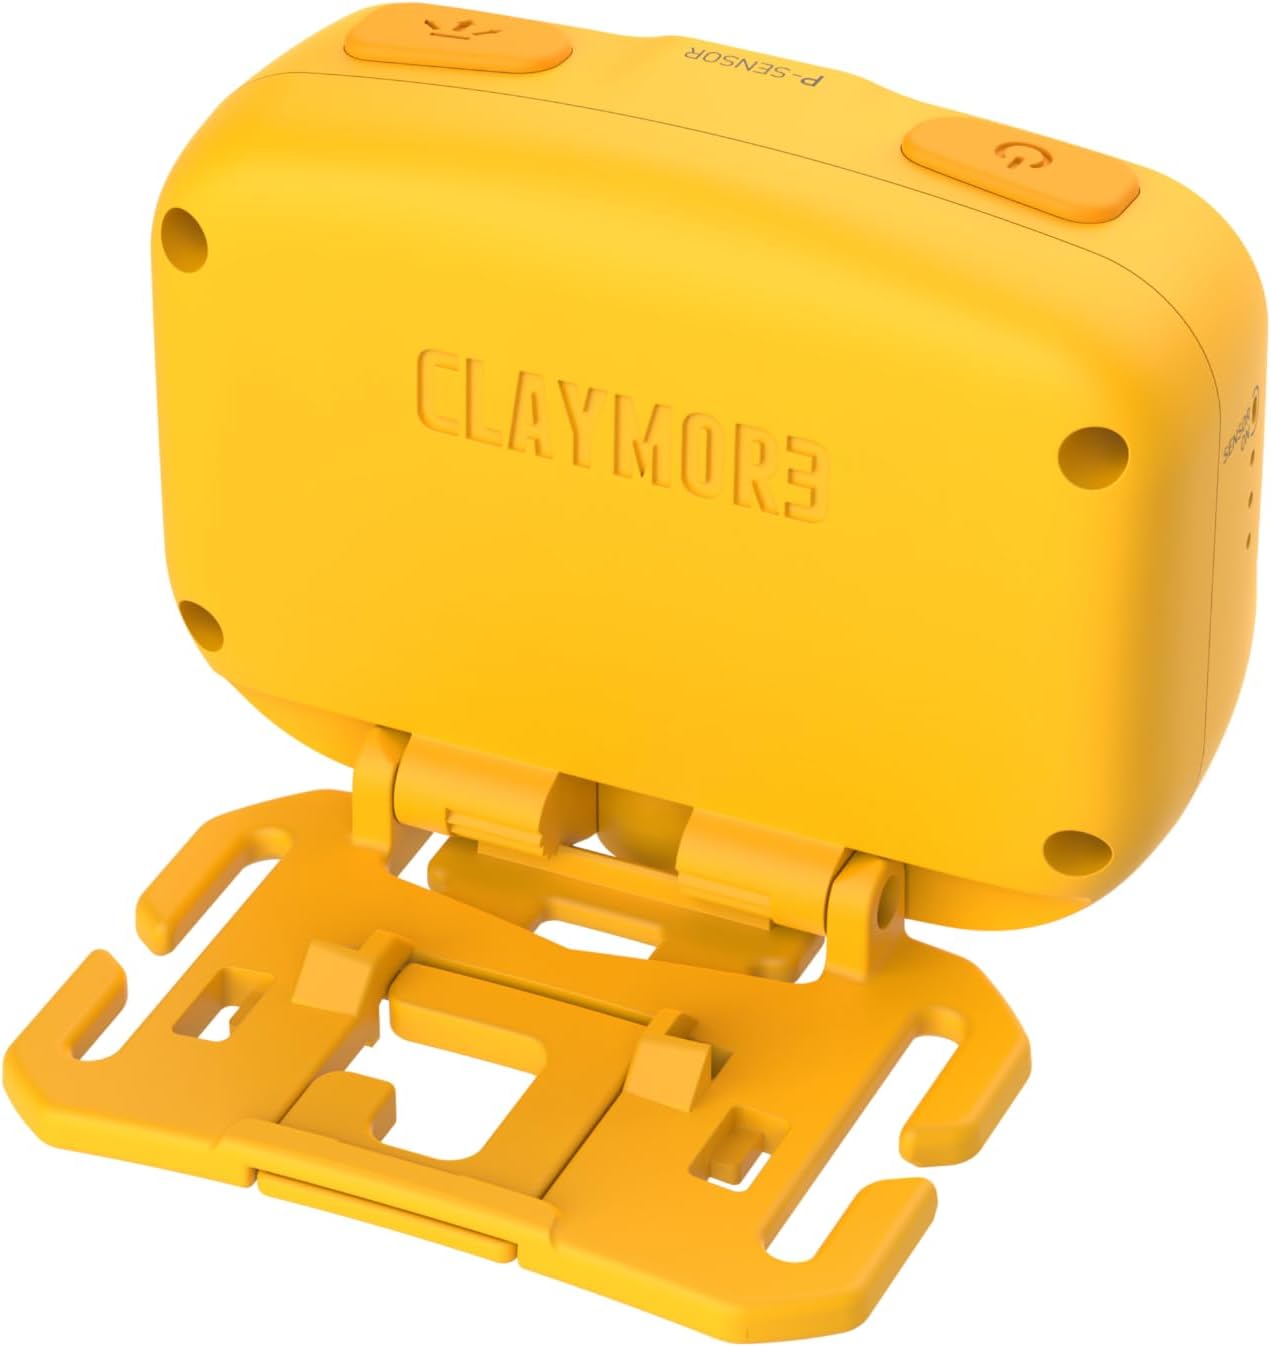
ምስል 4.4፡ ተመለስ View. This image presents the rear of the headlight, showing the CLAYMORE branding and the integrated mounting bracket for various attachments.
5. ማዋቀር
5.1 የፊት መብራቱን መሙላት
- Locate the USB-C port on the side of the headlight (refer to Figure 4.3).
- Connect the provided USB-C cable to the headlight and the other end to a USB power source (e.g., wall adapter, power bank, computer USB port). Ensure the power source provides 5V 1A.
- የኃይል መሙያ አመልካች መብራቱ የኃይል መሙያ ሁኔታን ያሳያል (ለምሳሌ፣ ለኃይል መሙያ ቀይ፣ ሙሉ በሙሉ ለመሙላት አረንጓዴ)።
- ሙሉ ክፍያ ብዙ ሰዓታትን ይወስዳል።
5.2 የመጫኛ አማራጮች
The CLAYMORE Heady3 offers multiple ways to attach and use the light:
- የጭንቅላት ማሰሪያ፡ Attach the headlight to the included headband for traditional headlamp መጠቀም.
- መንጠቆ፡ Utilize the integrated hook on the mounting bracket to hang the light from tents, branches, or other suitable fixtures.
- አዞ ክሊፕ፡- Attach the light to a bag, pocket, or other gear using an alligator clip (may require an additional accessory, not specified as included).
- Tripod Screw Hole: The headlight features a tripod screw hole for mounting on standard tripods or other compatible accessories, offering stable positioning.
6. የአሠራር መመሪያዎች
6.1 ማብራት / ማጥፋት
- To turn on the headlight, press and hold the power button (left button on top, refer to Figure 4.2).
- የፊት መብራቱን ለማጥፋት የኃይል አዝራሩን እንደገና ተጭነው ይያዙት።
6.2 የመብራት ሁነታዎችን መቀየር
The CLC-500 features 6 lighting modes:
- Cool White (5700K, 6500K): Bright, clear light for general illumination.
- White (4200K): Neutral white light.
- ሙቅ ነጭ (3000ሺህ) Softer, warmer light for comfortable ambiance.
- ቀይ መብራት; Preserves night vision and is less disruptive in dark environments.
- Diffused Light: Provides a wide, even spread of light.
- ትኩረት የተደረገ ብርሃን; Concentrated beam for long-distance illumination.
To cycle through the lighting modes, short press the mode button (right button on top, refer to Figure 4.2) while the light is on.
6.3 Brightness Adjustment (Dimming)
The brightness can be adjusted from 15 lumens to 500 lumens.
- While the light is on in any mode, press and hold the mode button to continuously adjust the brightness. Release the button when the desired brightness level is reached.
6.4 የእንቅስቃሴ ዳሳሽ ተግባር
The motion sensor allows for hands-free operation, enabling you to turn the light on/off or dim it with a wave of your hand.
- To activate the motion sensor, double-press the mode button. An indicator light (if present, not specified) may confirm activation.
- Once activated, wave your hand in front of the sensor (located centrally on the front, refer to Figure 4.1) to toggle the light on/off or to dim it, depending on the specific mode.
- To deactivate the motion sensor, double-press the mode button again.
7. ጥገና
- ማጽዳት፡ Wipe the headlight with a soft, dry cloth. Do not use abrasive cleaners or solvents.
- የባትሪ እንክብካቤ To prolong battery life, charge the device regularly, even if not in frequent use. Avoid fully discharging the battery for extended periods. Store in a cool, dry place.
- ማከማቻ፡ When storing for long periods, ensure the battery is partially charged (around 50%) and recharge every 3-6 months.
8. መላ መፈለግ
- መብራት የማይበራ;
- ባትሪው መሙላቱን ያረጋግጡ። ከኃይል ምንጭ ጋር ያገናኙና የኃይል መሙያ አመልካችውን ያረጋግጡ።
- የኃይል ቁልፉን ለጥቂት ሰከንዶች ተጭነው ይያዙት፤ ይህም የአጭር ጊዜ ፕሬስ ብቻ እንዳልሆነ ያረጋግጡ።
- መብራት ባትሪ እየሞላ አይደለም፤
- Check the USB-C cable for damage and ensure it's properly connected.
- Try a different USB power source or wall adapter.
- የእንቅስቃሴ ዳሳሽ ምላሽ አይሰጥም፦
- Ensure the motion sensor function is activated (double-press mode button).
- Clean the sensor area on the front of the headlight.
- በእጅዎ እና በአነፍናፊው መካከል ምንም እንቅፋቶች አለመኖራቸውን ያረጋግጡ።
9. ዝርዝሮች
| ሞዴል | CLC-500 |
| መጠኖች (በግምት) | 68 x 51 x 37 ሚሜ (2.7 x 2.0 x 1.5 ኢንች) |
| ክብደት (በግምት) | 82 ግ (2.9 አውንስ) |
| ብሩህነት | 15 - 500 Lumens |
| የብርሃን ቀለም ሙቀቶች | Cool: 5700K, 6500K / White: 4200K / Warm: 3000K / Red |
| ግቤት | USB 5V 1A |
| የባትሪ ዓይነት | ሊቲየም ፖሊመር (1 ተካትቷል) |
| ቁሳቁስ | አሉሚኒየም |
| ልዩ ባህሪያት | የእንቅስቃሴ ዳሳሽ |
10. ዋስትና እና ድጋፍ
This product comes with a standard manufacturer's warranty. For specific warranty terms and conditions, please refer to the documentation provided at the time of purchase or contact your retailer. For technical support or service inquiries, please contact the manufacturer or your local distributor.