
1. መግቢያ
Thank you for choosing the MOUNTUP Dual Monitor Arm MU8012-W-07. This instruction manual provides essential information for the safe and correct installation, operation, and maintenance of your new monitor arm. Please read this manual thoroughly before installation and keep it for future reference.
የደህንነት ጥንቃቄዎች
- ከመገጣጠምዎ በፊት ሁሉም ክፍሎች መኖራቸውን እና ምንም ጉዳት ሳይደርስባቸው መኖራቸውን ያረጋግጡ። የጎደሉ ወይም የተበላሹ ክፍሎች ካሉ አይጠቀሙ።
- Verify that your desk surface is strong enough to support the combined weight of the monitor arm and your monitors.
- Do not exceed the maximum weight capacity of 10kg (22 lbs) per arm.
- Always follow the installation steps carefully. Improper installation may result in product damage or personal injury.
- Keep children away from the product during assembly. Small parts may be a choking hazard.
2. የጥቅል ይዘቶች
እባክዎ የሚከተሉት ክፍሎች በሙሉ በጥቅልዎ ውስጥ መካተታቸውን ያረጋግጡ፡
- የማሳያ ክንድ አገጣጠም (x1)
- ቬሳ ሳህን (x2)
- ዴስክ ክሊamp መሠረት (x1)
- የግሮሜት ቤዝ (x1)
- የመጫኛ ሃርድዌር ኪት (ዊንጮች፣ ማጠቢያዎች፣ ስፔሰርስ)
- የሄክስ ዊንች (የተለያዩ መጠኖች)
- መመሪያ መመሪያ (x1)
3. ዝርዝሮች
| ባህሪ | ዝርዝር መግለጫ |
|---|---|
| ሞዴል | MU8012-W-07 |
| ቁሳቁስ | ቅይጥ ብረት |
| ቀለም | ነጭ |
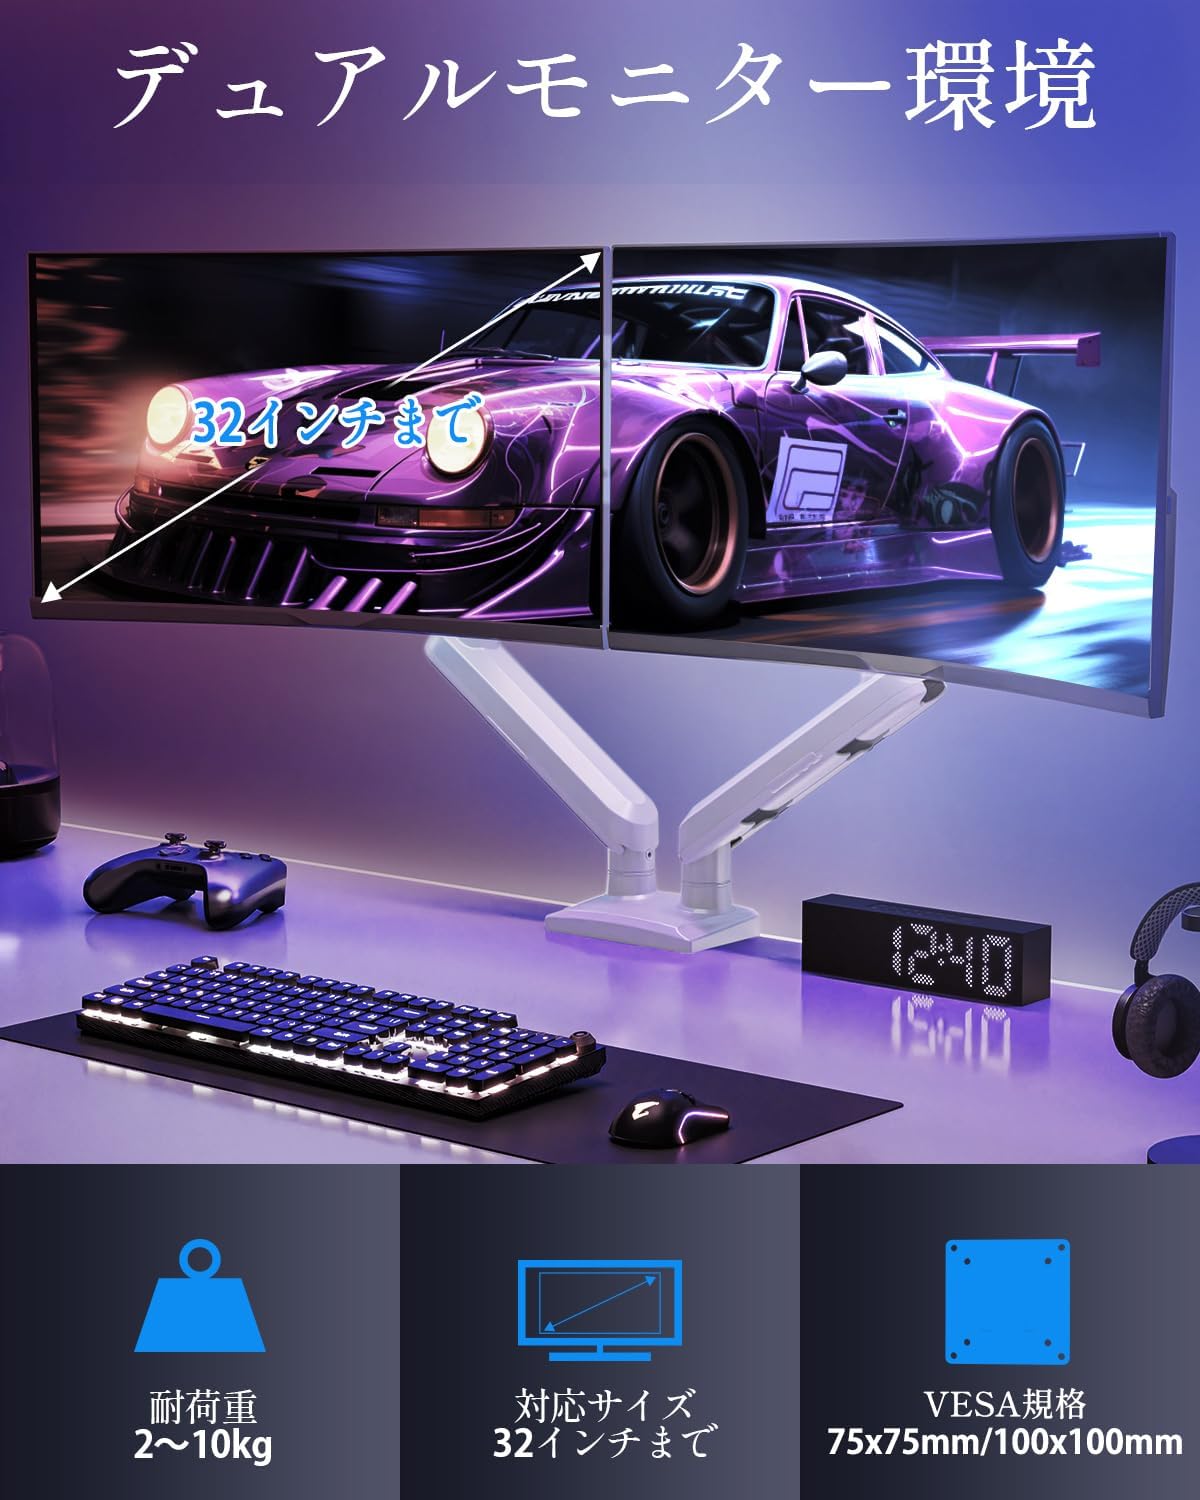
| የማያ መጠን ተኳኋኝነት | 13-32 ኢንች |
| የክብደት አቅም (በእጅ) | 2 - 10 kg (4.4 - 22 lbs) |
| የ VESA ተኳኋኝነት | 75x75 ሚሜ፣ 100x100 ሚሜ |
| የመጫኛ አማራጮች | Clamp, Grommet |
| የማዘንበል ክልል | +85° እስከ -45° |
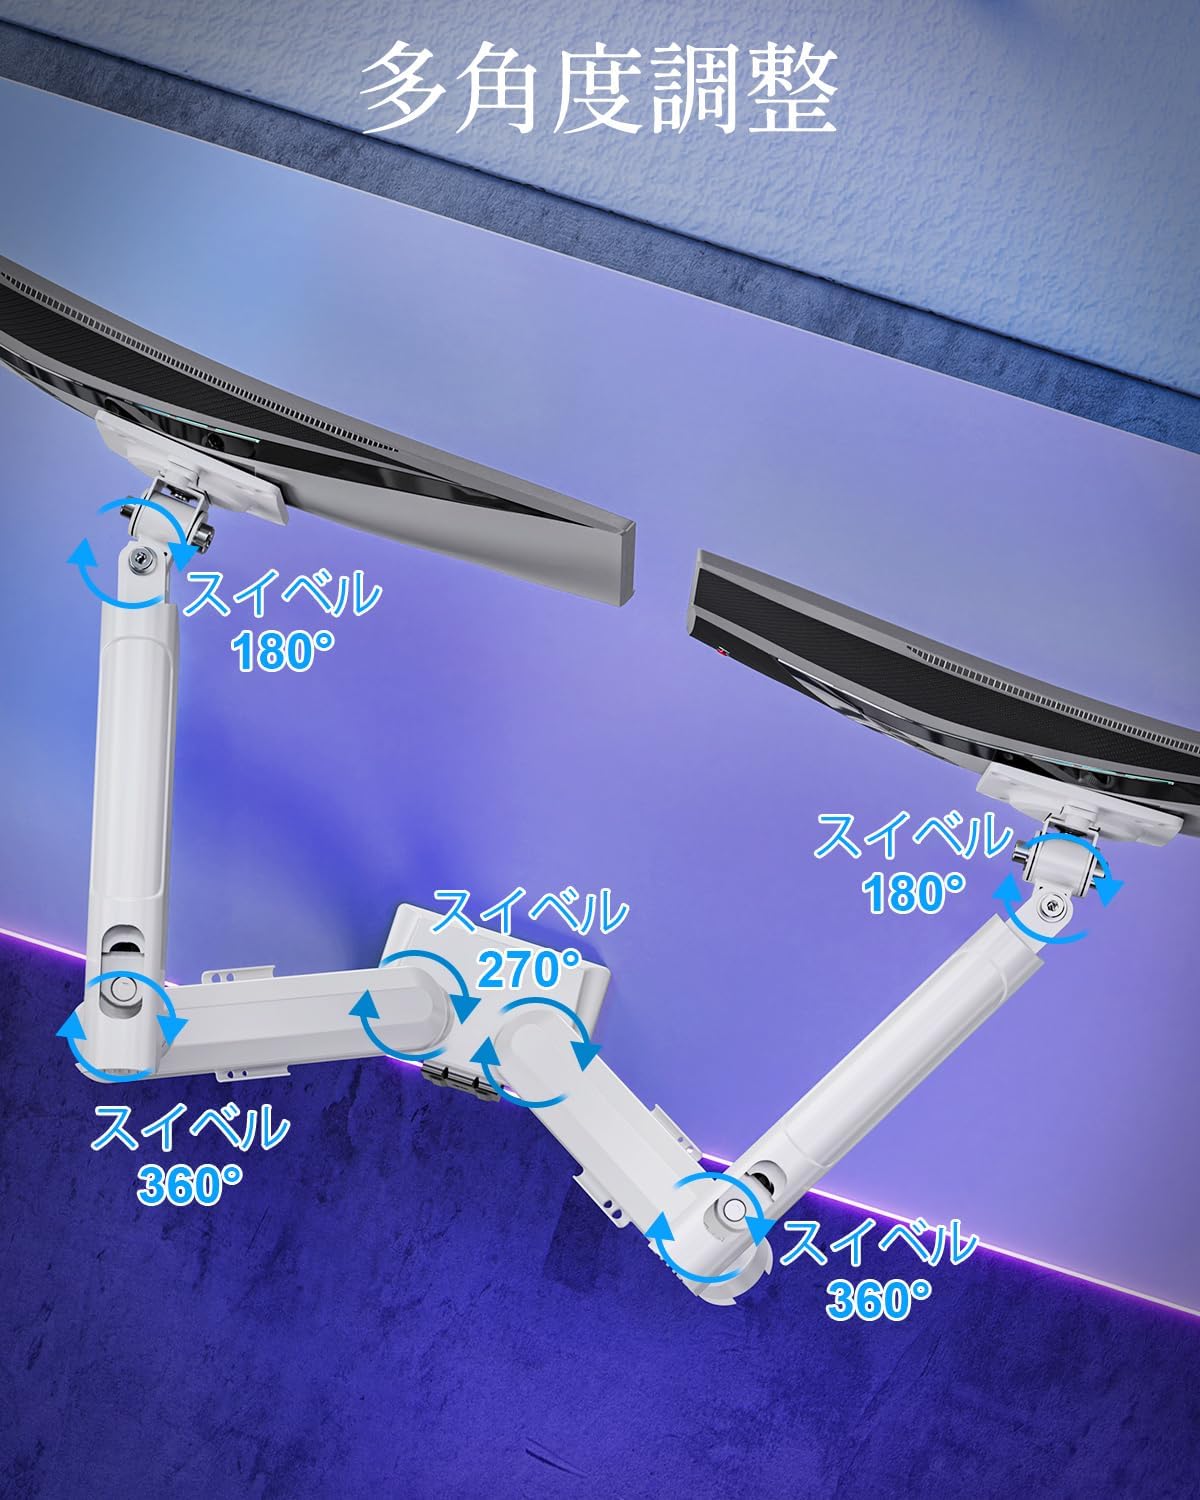
| ስዊቭል ክልል | 180° (monitor plate), 270° (middle joint), 360° (base) |
| Rotation (Pivot) | 360° |
| ከፍተኛ የቁመት ማስተካከያ | 44 ሴሜ (17.3 ኢንች) |
| ከፍተኛ የእጅ ማራዘሚያ | 50 ሴሜ (19.7 ኢንች) |
| የምርት ክብደት | 3.1 ኪግ (6.8 ፓውንድ) |

4. ማዋቀር እና መጫን
ደረጃ 1፡ የመጫኛ ዘዴዎን ይምረጡ
The MOUNTUP Dual Monitor Arm supports two installation methods: Clamp Mount and Grommet Mount. Choose the method that best suits your desk.

Clamp መጫኛ መጫኛ
- cl ን ያያይዙamp ከመቆጣጠሪያው ክንድ ዋና ምሰሶ ጋር መሠረት ያድርጉ።
- cl ያስቀምጡamp onto the edge of your desk. Ensure the desk thickness is between 10-70mm (0.4-2.7 inches).
- የ clamp screw until the arm is securely fastened to the desk. Ensure it is stable and does not wobble.

Grommet ተራራ መጫን
- If your desk has a grommet hole, ensure its diameter is between 10-60mm (0.4-2.4 inches) and the desk thickness is between 10-70mm (0.4-2.7 inches).
- የግሮሜት መሰረቱን ከዋናው ምሰሶ ጋር ያያይዙት።
- Insert the grommet bolt through the desk hole and secure it from underneath with the provided plate and nut.
- Tighten the nut until the arm is firmly attached to the desk.
ደረጃ 2፡ የVESA ሰሌዳዎችን ወደ ተቆጣጣሪዎች ያያይዙ
- Carefully lay your monitor face down on a soft, clean surface.
- የVESA ሰሌዳውን ከማሳያዎ ጀርባ ላይ ካሉት የመጫኛ ቀዳዳዎች ጋር ያስተካክሉት።
- Use the appropriate screws (M4 or M5) and washers from the hardware kit to secure the VESA plate to the monitor. Do not overtighten.
ደረጃ 3፡ ሞኒተሮችን ወደ ክንዶች መትከል
- Slide the monitor (with the attached VESA plate) onto the VESA head of the monitor arm.
- Ensure the monitor clicks into place or is securely fastened by the quick-release mechanism.
- ለሁለተኛው ማሳያ ይድገሙት።

ደረጃ 4: የኬብል አስተዳደር
Route your monitor cables through the integrated cable management clips on the underside of the arms. This helps maintain a tidy workspace.

5. ኦፕሬቲንግ እና ማስተካከያዎች
The MOUNTUP Dual Monitor Arm offers flexible adjustments to optimize your viewልምድ.

Adjusting Arm Tension (Gas Spring)
The gas spring mechanism allows for smooth height adjustments. If your monitor sags or is difficult to move, you may need to adjust the tension.

- To increase tension (if monitor sags): Use the provided hex wrench to turn the adjustment screw clockwise.
- To decrease tension (if arm is too stiff): Turn the adjustment screw counter-clockwise.
- Always adjust tension with the arm held horizontally. Test the movement after each small adjustment until the monitor holds its position freely.
ማስተካከያዎችን ይቆጣጠሩ
- የከፍታ ማስተካከያ; Gently push or pull the monitor up or down to your desired height. The gas spring will assist in holding the position. Max height is 44cm (17.3 inches).
- የማዘንበል ማስተካከያ፡ Tilt the monitor screen up to +85° or down to -45° to reduce glare and optimize viewing angles. Loosen the tilt bolt, adjust, then re-tighten.
- የማዞሪያ ማስተካከያ፡ The arm allows for 180° swivel at the monitor plate, 270° at the middle joint, and 360° at the base, providing wide range of motion.
- Rotation (Pivot): Rotate your monitor 360° to switch between landscape and portrait orientations.

6. ጥገና
- ማጽዳት፡ የማሳያውን ክንድ በለስላሳ፣ d ይጥረጉamp ጨርቅ. ማጠናቀቂያውን ሊጎዱ የሚችሉ ማጽጃዎችን ወይም ፈሳሾችን ያስወግዱ።
- ወቅታዊ ፍተሻዎች፡- ጥብቅ እና ደህንነታቸው የተጠበቀ መሆናቸውን ለማረጋገጥ ሁሉንም ብሎኖች እና ግንኙነቶች በየጊዜው ያረጋግጡ። አስፈላጊ ከሆነ እንደገና አጥብቀው ይያዙ.
- Gas Spring Longevity: The high-quality gas spring is tested for over 20,000 cycles. Proper tension adjustment will help maintain its performance over time.

7. መላ መፈለግ
- የክትትል መቆጣጠሪያው ይንቀጠቀጣል ወይም አይቆምም፦ The gas spring tension is too low. Refer to the "Adjusting Arm Tension" section and turn the adjustment screw clockwise to increase tension.
- Arm is Too Stiff or Difficult to Move: The gas spring tension is too high. Refer to the "Adjusting Arm Tension" section and turn the adjustment screw counter-clockwise to decrease tension.
- የማሳያ ዎብልስ፡ Ensure all mounting screws (VESA plate to monitor, arm to desk) are securely tightened. Check that the desk clamp or grommet mount is firm.
- Monitor Tilt Angle Won't Hold: The tilt bolt may be loose. Tighten the tilt bolt on the VESA head.
8. ዋስትና እና ድጋፍ
MOUNTUP የሚከተሉትን ያቀርባል የ 2 ዓመት ጥራት ዋስትና ለዚህ ምርት ከተገዛበት ቀን ጀምሮ። ይህ ዋስትና ከመደበኛ አጠቃቀም የሚመጡ የማምረቻ ጉድለቶችን እና ችግሮችን ይሸፍናል።
If you encounter any problems with your MOUNTUP Dual Monitor Arm, or if you have questions regarding installation or operation, please contact our customer support. You can typically find seller contact information through your purchase history on the platform where you bought the product (e.g., Amazon order details).
Please have your model number (MU8012-W-07) and purchase date ready when contacting support to ensure a swift resolution.