1. መግቢያ
The Run Bison 18W LED Emergency Driver is designed to provide emergency illumination for LED light fixtures during a power outage. This driver ensures a minimum of 90 minutes of illumination, making it suitable for various commercial lighting applications. It is UL listed, ensuring compliance with safety standards.
This emergency driver is compatible with LED commercial lights with an input power between 10W and 150W that feature a 0-10V dimming function. It also supports 10W-16W LED lights without a 0-10V dimming function. The unit includes a test switch/pilot light for monitoring system operation.
2. የደህንነት መረጃ
ከመጫንዎ እና ከመጠቀምዎ በፊት ሁሉንም መመሪያዎች በጥንቃቄ ያንብቡ። እነዚህን መመሪያዎች አለመከተል የኤሌክትሪክ ንዝረት፣ እሳት ወይም ሌሎች አደጋዎችን ሊያስከትል ይችላል።
- መጫኑ በብሔራዊ እና በአካባቢው የኤሌክትሪክ ኮዶች መሠረት ብቃት ባለው ኤሌክትሪክ ባለሙያ መከናወን አለበት.
- ከመጫንዎ ወይም ከማገልገልዎ በፊት በሰርኩሪቱ ላይ ሃይል መቋረጡን ያረጋግጡ።
- Do not use this device with incompatible lighting fixtures or outside its specified voltagሠ ክልል።
- The emergency driver contains a rechargeable battery. Do not expose to fire or extreme temperatures.
- በአካባቢያዊ ደንቦች መሰረት ባትሪዎችን በትክክል ያስወግዱ.
3. የጥቅል ይዘቶች
መጫኑን ከመጀመርዎ በፊት ሁሉም አካላት መኖራቸውን ያረጋግጡ-
- የ LED የአደጋ ጊዜ ምትኬ ነጂ
- Installation accessories (e.g., test switch/pilot light, wiring connectors)
4. ዝርዝሮች
| ባህሪ | ዝርዝር መግለጫ |
|---|---|
| የምርት ስም | Run Bison |
| የሞዴል ቁጥር | RBHV18W-EM-170V-4PK |
| የምርት ልኬቶች | 13.6 x 1.6 x 1 ኢንች |
| ግብዓት Voltage | AC 100-277V |
| የውጤት ቁtage | ዲሲ 150-270V |
| ዋትtage | 18 ዋት |
| የአደጋ ጊዜ | ከ 90 ደቂቃዎች በላይ |
| የኃይል መሙያ ጊዜ | ለሙሉ ክፍያ 24 ሰዓታት |
| ከፍተኛው የአሁን ግቤት | 120mA |
| አማካይ ህይወት | 50,000 ሰዓታት |
| የአሠራር ሙቀት | 41℉ እስከ 122℉ (5℃ እስከ 50℃) |
| የምስክር ወረቀቶች | UL የተረጋገጠ |
| ቁሳቁስ | ብረት |
5. ማዋቀር እና መጫን
Before installation, ensure the main power supply to the fixture is turned off at the circuit breaker.
5.1 ምርት አልፏልview

Image: The 18W LED Emergency Driver unit, highlighting its key features such as 24+ hours charging time, 90 minutes backup, 18W output power, 120mA max input current, 100-277V compatibility, and 0-10V dimming capability.
5.2 ልኬቶች

Image: A diagram showing the physical dimensions of the emergency LED driver (13.6 inches long, 1.6 inches wide, 1 inch high) and the separate LED indicator test switch.
5.3 የሽቦ ዲያግራም

Image: A detailed wiring diagram illustrating connections for the emergency LED driver, normal LED driver, LED module, dimmer, and test switch. It shows AC line (red), Neutral (white), AC line switch (black), Ground (green), Dimmer (purple/pink), and connections to the emergency driver (gray/orange) and normal LED driver (brown/blue).
- የኤሲ ኃይልን ያገናኙ፡ Connect the AC line (red wire) and Neutral (white wire) from the building's power supply to the corresponding inputs on the emergency driver.
- Connect to AC Line Switch: Connect the AC line switch (black wire) to the designated input on the emergency driver.
- የመሬት ግንኙነት; Ensure the ground wire (green wire) is properly connected to a suitable ground.
- አደብዝዝ ግንኙነቶች (የሚመለከተው ከሆነ) If using a 0-10V dimmable fixture, connect the dimmer's purple (+) and pink (-) wires to the corresponding Dim+ and Dim- terminals on the emergency driver.
- Connect to LED Module: Connect the emergency driver's output wires (gray and orange) to the LED module. Ensure correct polarity.
- Connect to Normal LED Driver: Connect the emergency driver to the normal LED driver using the brown (L) and blue (N) wires as indicated.
- Install Test Switch/Pilot Light: Mount the test switch/pilot light in an accessible location and connect its wires to the emergency driver as per the diagram.
5.4 Compatible Lighting Fixtures
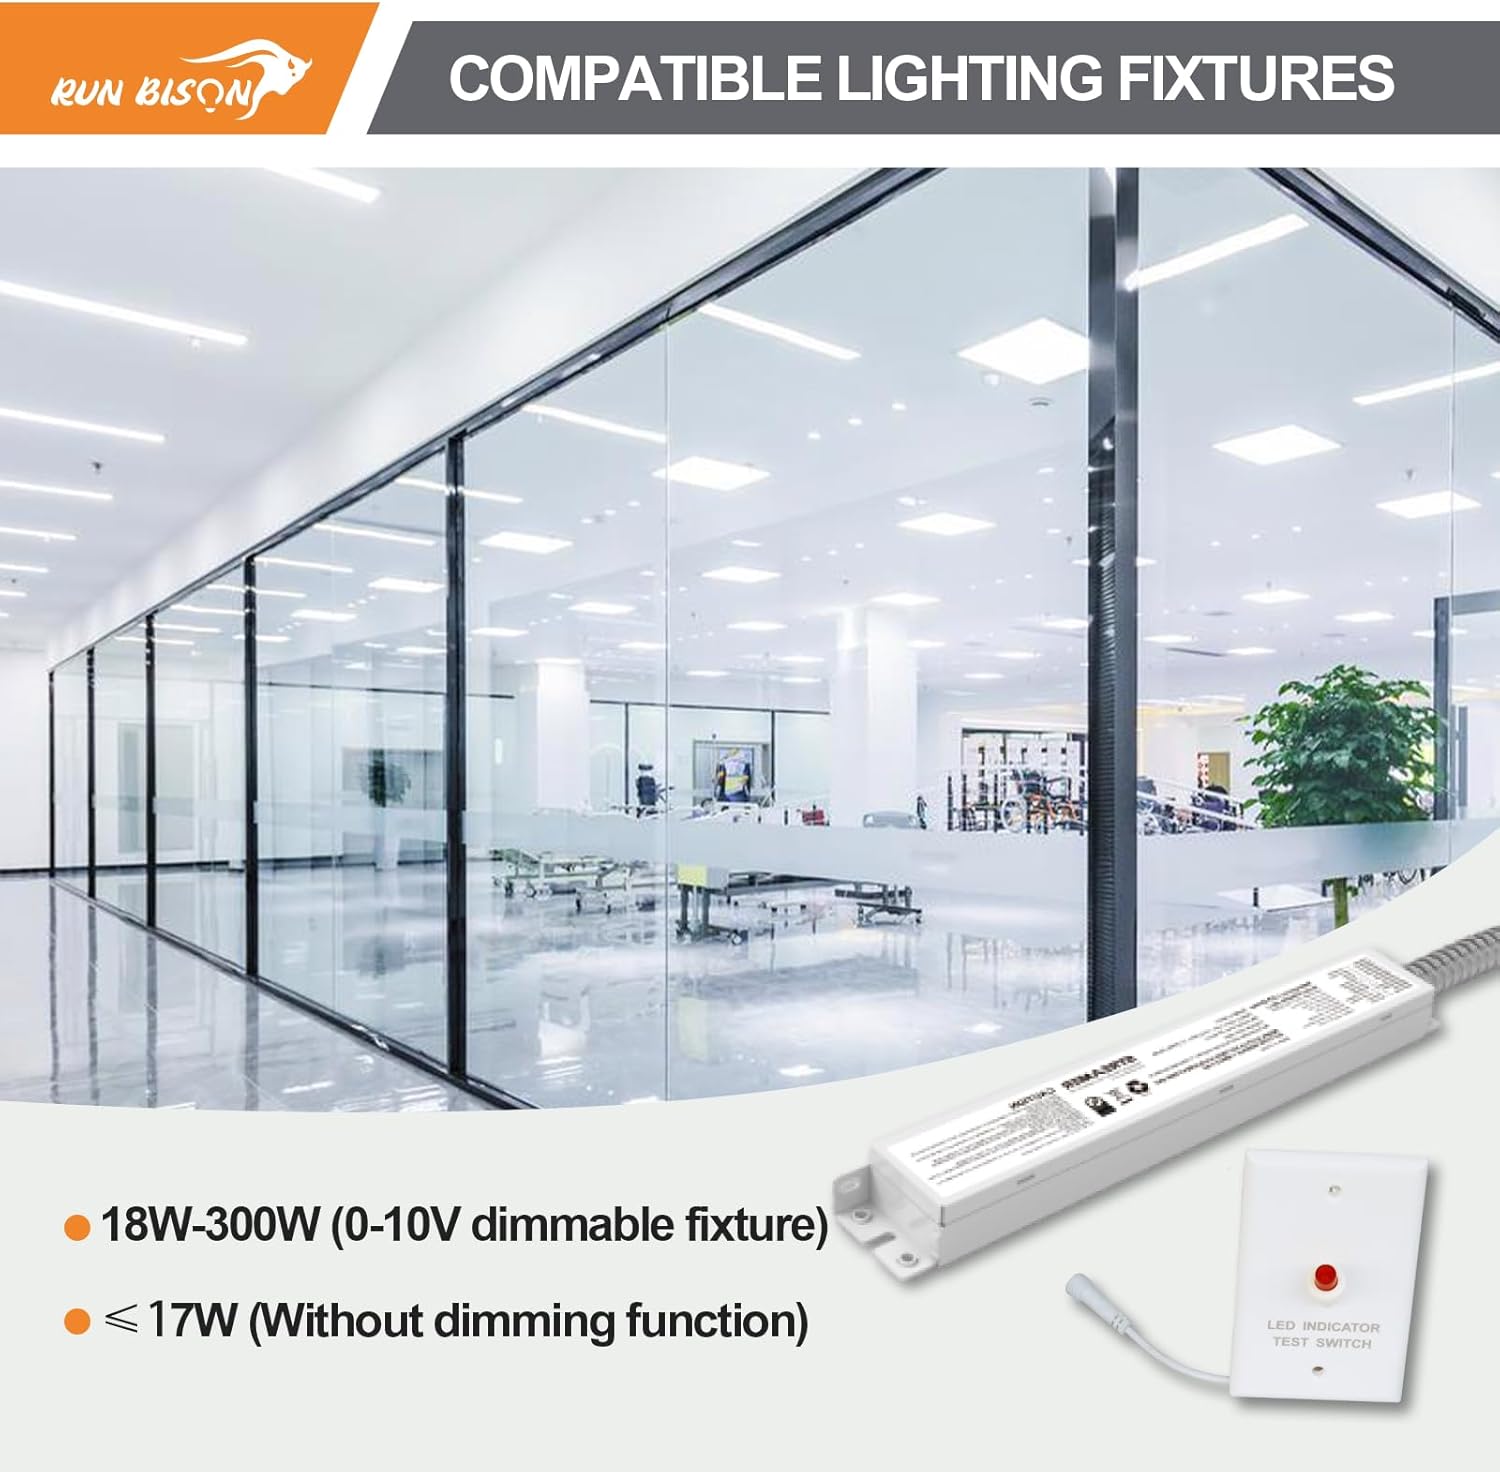
Image: The emergency LED driver shown alongside various commercial lighting fixtures, indicating compatibility with 18W-300W (0-10V dimmable fixtures) and ≤17W (without dimming function) LED lights.
5.5 ማመልከቻ ዘፀampሌስ

Image: A collage of commercial environments demonstrating the wide application of the emergency LED driver with different light types, including LED Panel Light, LED High Bay Light, LED Troffer Light, and LED Wrap Light.
6. የአሠራር መመሪያዎች
6.1 መደበኛ ክወና
When AC power is present, the emergency driver charges its internal battery. The pilot light on the test switch will illuminate, indicating that the battery is charging and the system is ready for emergency operation.
6.2 የአደጋ ጊዜ ሁኔታ
Upon loss of normal AC power, the emergency driver automatically switches to emergency mode, providing power to the connected LED fixture for over 90 minutes. The pilot light on the test switch will typically turn off or change color to indicate emergency operation.
6.3 Rest Mode
To conserve battery life during storage or extended periods without AC power, the emergency driver can be put into 'Rest Mode'. Press and hold the test switch for more than 3 seconds while in emergency mode to activate this feature. In rest mode, the leakage current is significantly reduced, extending the battery's storage time.
6.4 Testing the System
Press the test switch briefly to simulate a power outage and verify that the emergency lighting system is functioning correctly. The connected LED fixture should illuminate in emergency mode. Release the button to return to normal operation.
7. ጥገና
Regular maintenance ensures the longevity and reliability of your emergency LED driver.
- የመጀመሪያ ክፍያ Allow the unit to charge for at least 24 hours after initial installation to ensure the battery is fully charged and ready for emergency use.
- ወርሃዊ ሙከራ፡- Conduct a monthly 30-second test using the test switch to ensure the emergency function is operational.
- ዓመታዊ ሙከራ፡- Perform an annual 90-minute discharge test. Disconnect AC power to the unit and allow it to operate in emergency mode for the full 90 minutes. Reconnect AC power and allow the battery to recharge for 24 hours.
- የባትሪ መተካት፡ The internal battery is designed for a long life, but its capacity will diminish over time. If the unit fails to provide 90 minutes of emergency illumination during the annual test, the battery may need replacement. Contact a qualified technician for service.
- ማጽዳት፡ Keep the unit clean and free from dust. Use a dry cloth for cleaning. Do not use liquid cleaners.
8. መላ መፈለግ
If you encounter issues with your emergency LED driver, refer to the following common problems and solutions:
| ችግር | ሊሆን የሚችል ምክንያት | መፍትሄ |
|---|---|---|
| LED fixture does not illuminate in emergency mode. | No AC power to the unit; Battery not charged; Faulty wiring; Damaged battery. | Check AC power supply. Allow 24 hours for initial charge. Verify all wiring connections. If problem persists, contact support. |
| Emergency illumination lasts less than 90 minutes. | Battery not fully charged; Battery nearing end of life. | Ensure unit has charged for 24 hours. If issue persists after full charge, battery may need replacement. |
| Pilot light on test switch is off during normal operation. | No AC power; Faulty wiring to test switch; Faulty test switch. | Check AC power. Verify test switch wiring. Replace test switch if necessary. |
| Unit does not enter Rest Mode. | Test switch not held long enough; Unit not in emergency mode. | Ensure unit is in emergency mode (AC power off) and hold test switch for more than 3 seconds. |
የመላ ፍለጋ እርምጃዎች ችግሩን ካልፈቱ፣ እባክዎ የደንበኛ ድጋፍን ያግኙ።
9. ዋስትና እና ድጋፍ
9.1 ዋስትና
This Run Bison LED Emergency Driver is covered by a የ 5 ዓመት የአምራች ዋስትና from the date of purchase. This warranty covers defects in materials and workmanship under normal use. It does not cover damage caused by improper installation, misuse, abuse, or acts of nature.
9.2 የደንበኛ ድጋፍ
For technical assistance, warranty claims, or any questions regarding your Run Bison LED Emergency Driver, please contact Run Bison customer support. Refer to your purchase documentation or the manufacturer's webየእውቂያ መረጃ ለማግኘት ጣቢያ.