
1. መግቢያ
This manual provides detailed instructions for the Pingequa Flipper Zero Wi-Fi Devboard. This expansion module enhances your Flipper Zero with Wi-Fi connectivity and comes pre-installed with Marauder firmware, enabling advanced wireless testing capabilities. Please read this manual thoroughly before use to ensure proper setup and operation.
2. ቁልፍ ባህሪያት
- የWi-Fi ግንኙነት፡- Seamlessly integrates Wi-Fi capabilities with your Flipper Zero.
- Pre-installed Marauder Firmware: Equipped with Marauder firmware for advanced Wi-Fi testing.
- ESP32-S2 Chipset: Utilizes a powerful ESP32-S2 chipset for robust performance.
- Easy Firmware Installation: Supports effortless flashing of new firmware for customization and expanded functionalities.
- ሁለገብ አፕሊኬሽኖች Suitable for network security research, IoT projects, development, and remote device management.
3. በሳጥኑ ውስጥ ያለው
Upon opening your package, please verify that all components are present:
- 1x Pingequa Flipper Zero Wi-Fi Devboard
- 1x WiFi Board
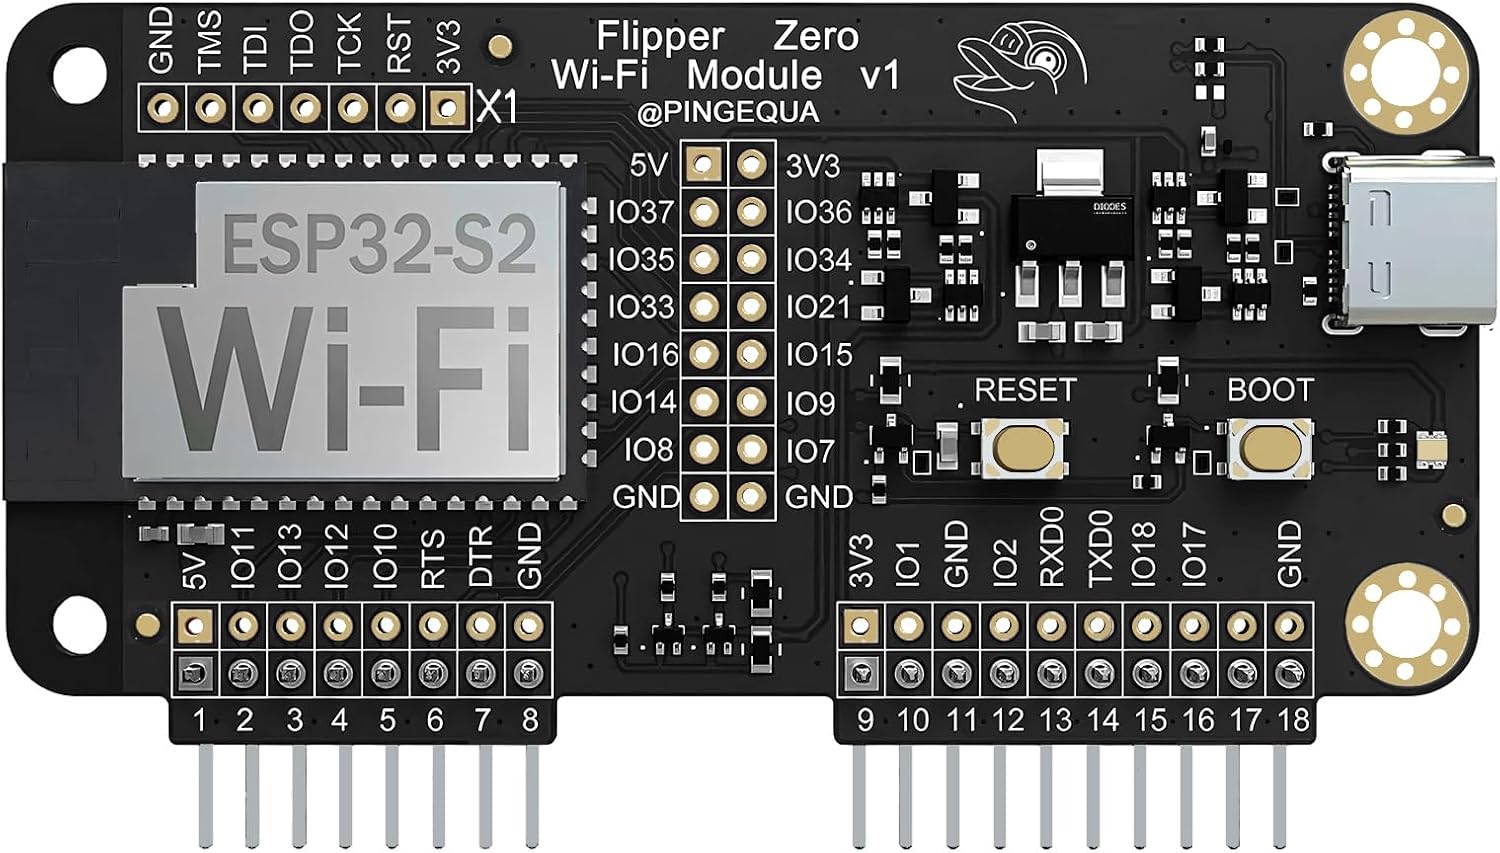
Image 1: The Pingequa Flipper Zero Wi-Fi Devboard.
4. የማዋቀር መመሪያ
4.1. አካላዊ ጭነት
- Ensure your Flipper Zero is powered off before connecting the Wi-Fi Devboard.
- Carefully align the pins of the Wi-Fi Devboard with the GPIO pins on your Flipper Zero.
- Gently press the Devboard into place until it is securely seated.

Image 2: Flipper Zero with the Wi-Fi Devboard securely attached.
4.2. Initial Configuration (GPIO Pins)
For the Wi-Fi Devboard to function correctly, you may need to configure the GPIO pins on your Flipper Zero. This process is similar for various Flipper Zero modules.
- Power on your Flipper Zero.
- ወደ መተግበሪያዎች ምናሌ.
- የሚለውን ይምረጡ ሞመንተም application (or similar firmware interface).
- ወደ ሂድ ፕሮቶኮሎች, ከዚያም GPIO ፒኖች.
- Ensure the correct SPI settings are selected for the ESP32-S2 module. Typically, this involves setting ESP32/8266 SPI ወደ ነባሪ 1. Refer to your Flipper Zero's specific firmware documentation for exact pin assignments if issues arise.

Image 3: Flipper Zero display showing firmware selection options.
4.3. Visual Setup Guide
For a visual walkthrough of connecting a module and configuring GPIO pins on the Flipper Zero, please refer to the following video. While this video demonstrates a different RF module, the physical connection and GPIO setup steps are generally applicable.
Video 1: General guide on setting up and using an RF module with Flipper Zero, including GPIO pin configuration.
5. ኦፕሬሽን
The Pingequa Wi-Fi Devboard comes pre-installed with Marauder firmware, designed for various wireless testing and analysis tasks. After successful setup, you can access its functionalities through your Flipper Zero interface.
5.1. Accessing Marauder Firmware
- From the Flipper Zero main menu, navigate to መተግበሪያዎች.
- Select the application associated with the Wi-Fi Devboard (often labeled "ESP32" or "Marauder").
- Within the Marauder interface, you will find options for various Wi-Fi testing functionalities, such as network scanning, deauthentication attacks, and packet capture.

Image 4: Flipper Zero display showing the Marauder firmware menu with various Wi-Fi options.
5.2. የጽኑ ዝማኔዎች
The Devboard supports easy firmware updates. To flash new firmware, connect the Devboard to your computer via its USB-C port while holding down the reset button. Follow the instructions provided by the firmware developer for the specific update process.
6. ጥገና
- Keep the Wi-Fi Devboard clean and free from dust and debris. Use a soft, dry cloth for cleaning.
- ሞጁሉን ለከፍተኛ ሙቀት፣ እርጥበት ወይም ቀጥተኛ የፀሐይ ብርሃን ከማጋለጥ ይቆጠቡ።
- Handle the module carefully to prevent damage to the pins or internal components.
- Store the module in a protective case when not in use to prevent physical damage.
7. መላ መፈለግ
| ችግር | ሊሆን የሚችል ምክንያት | መፍትሄ |
|---|---|---|
| Flipper Zero does not recognize the Devboard. | Incorrect GPIO pin configuration or loose connection. | Ensure the Devboard is securely connected to the Flipper Zero's GPIO pins. Verify GPIO pin settings in the Flipper Zero firmware (refer to Section 4.2). Try re-flashing the Devboard firmware if necessary. |
| Wi-Fi functions are not working. | Incorrect firmware, outdated firmware, or improper application selection. | Confirm that the Marauder firmware is correctly installed and up-to-date. Ensure you are selecting the correct application within the Flipper Zero menu. |
| Devboard is not powering on. | Loose connection or Flipper Zero power issue. | Check the connection to the Flipper Zero. Ensure the Flipper Zero itself is adequately charged and functioning. |
8. ዝርዝሮች
| ባህሪ | ዝርዝር |
|---|---|
| የሞዴል ስም | WiFi Devboard for Flipper Zero |
| የንጥል ሞዴል ቁጥር | WiFi Devboard |
| ፕሮሰሰር ብራንድ | ኤስፕሬሲፍ |
| ስርዓተ ክወና | ማራውደር |
| የግንኙነት ቴክኖሎጂ | ዋይ ፋይ |
| ራም | LPDDR2 |
| የማህደረ ትውስታ ማከማቻ አቅም | 2 ሜባ |
| የእቃው ክብደት | 1.13 አውንስ |
| የጥቅል ልኬቶች | 4.29 x 3.39 x 1.46 ኢንች |
9. ዋስትና እና ድጋፍ
This Pingequa product is covered by a standard manufacturer's warranty against defects in materials and workmanship. For specific warranty terms and conditions, please refer to the product packaging or contact Pingequa customer support.
For technical assistance, troubleshooting, or general inquiries, please visit the Pingequa Store on Amazon ወይም በቀጥታ የደንበኛ አገልግሎታቸውን ያነጋግሩ።