1. መግቢያ
This manual provides detailed instructions for the installation, operation, and maintenance of your CP PLUS 4MP Wi-Fi Floodlight Camera, model CP-F42A. Please read this manual thoroughly before using the product to ensure proper functionality and safety. This camera combines high-resolution video surveillance with integrated floodlighting for enhanced security.
2. የደህንነት መረጃ
- Ensure the power supply matches the camera's requirements.
- ካሜራውን ለመበተን ወይም ለመቀየር አይሞክሩ።
- Install the camera in a location where it is protected from extreme weather conditions, although it has an IP54 rating, direct exposure to heavy rain or prolonged submersion is not recommended.
- Keep the camera away from heat sources and direct sunlight.
- አካላዊ ጉዳትን ለማስወገድ ካሜራውን በጥንቃቄ ይያዙ።
- Consult a qualified electrician for installation if you are unsure about electrical wiring.
3. የጥቅል ይዘቶች
ሁሉም እቃዎች በጥቅሉ ውስጥ መኖራቸውን ያረጋግጡ፡-
- CP PLUS 4MP Wi-Fi Floodlight Camera (CP-F42A)
- የኃይል አስማሚ
- መስቀያ ብሎኖች እና ግድግዳ ተሰኪዎች
- ፈጣን ጅምር መመሪያ (በዚህ መመሪያ ውስጥ አልተካተተም)
4. ምርት አብቅቷልview
The CP-F42A is an outdoor Wi-Fi floodlight camera designed for surveillance and illumination. It features a 4MP sensor for clear video, H.265 video compression for efficient storage, and a 110° viewing angle. The integrated floodlight provides illumination, and the PIR sensor detects motion up to 12 meters.
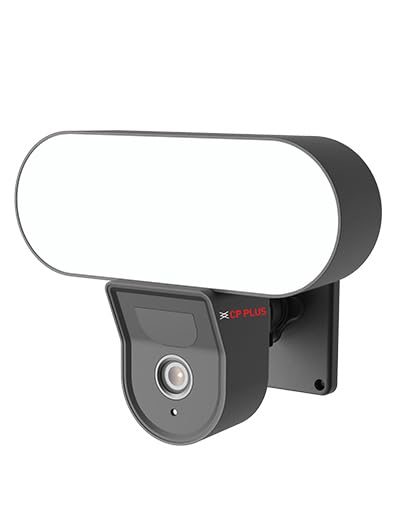
ምስል፡ ፊት ለፊት view of the CP PLUS 4MP Wi-Fi Floodlight Camera CP-F42A, showing the camera lens and the integrated floodlight panel.
ቁልፍ አካላት፡-
- የካሜራ ሌንስ; 4 ሜፒ ቪዲዮ ይቀርጻል።
- Floodlight Panel: ብርሃን ይሰጣል.
- PIR ዳሳሽ እንቅስቃሴን ያውቃል።
- ማይክሮፎን ለድምጽ ግብአት።
- ተናጋሪ፡- ለሁለት መንገድ የድምጽ ውፅዓት።
- የመጫኛ ቅንፍ፡ ለአስተማማኝ ጭነት.
5. ማዋቀር
5.1 አካላዊ ጭነት
- ቦታ ይምረጡ፡- ከቤት ውጭ ግልጽ የሆነ ቦታ ይምረጡ view of the area you wish to monitor and within Wi-Fi range. Ensure the mounting surface is sturdy.
- የመሰርሰሪያ ነጥቦችን ምልክት ያድርጉ፡ በግድግዳው ላይ ያሉትን የዊንች ቀዳዳዎች ምልክት ለማድረግ የመጫኛ ቅንፉን እንደ አብነት ይጠቀሙ።
- ጉድጓዶች ቁፋሮ; ምልክት በተደረገባቸው ቦታዎች ላይ የሙከራ ቀዳዳዎችን ይቆፍሩ። በግድግዳ ላይ ከተገጠሙ የግድግዳ መሰኪያዎችን ያስገቡ።
- ካሜራውን ይጫኑ; Secure the mounting bracket to the wall using the provided screws. Attach the camera to the bracket.
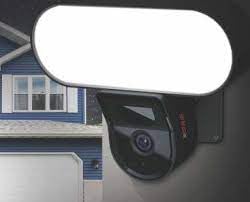
Image: The CP PLUS Floodlight Camera mounted on the exterior of a house, illustrating a typical installation scenario during the day.
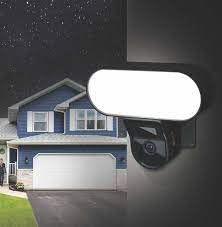
Image: The CP PLUS Floodlight Camera mounted on the exterior of a house at night, with the floodlight illuminated, demonstrating its night-time functionality.
5.2 የኃይል ግንኙነት
Connect the provided power adapter to the camera's power input port and then plug it into a suitable electrical outlet. Ensure the connection is secure and protected from moisture.
5.3 የዋይፋይ ግንኙነት እና የመተግበሪያ ማጣመር
- መተግበሪያውን ያውርዱ፡- ፈልግ the "ezyKam+" app (or the recommended CP PLUS app) on your smartphone's app store (iOS or Android) and install it.
- መለያ ፍጠር፡- መተግበሪያውን ይክፈቱ እና ለአዲስ መለያ ይመዝገቡ ወይም አስቀድመው ካለዎት ይግቡ።
- መሣሪያ አክል፡ Follow the in-app instructions to add a new device. Select "Floodlight Camera" or a similar option.
- ከWi-Fi ጋር ይገናኙ፡ The app will guide you through connecting the camera to your home Wi-Fi network. This usually involves scanning a QR code on the camera or entering your Wi-Fi credentials.
- የተሟላ ማዋቀር; Once connected, you can name your camera and adjust initial settings.
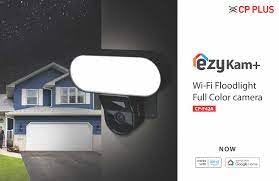
Image: Branding for CP PLUS ezyKam+ Wi-Fi Floodlight Full Color Camera, indicating compatibility with Alexa and Google Home, relevant for app pairing and smart home integration.
6. የአሠራር መመሪያዎች
Access all camera functions through the dedicated mobile application.
6.1 ቀጥታ ስርጭት View
መተግበሪያውን ይክፈቱ እና ካሜራዎን ከመሳሪያዎች ዝርዝር ውስጥ ይምረጡ view the live video feed. You can pinch to zoom and pan across the image.
6.2 መቅዳት እና መልሶ ማጫወት
- በእጅ መቅዳት፡ በቀጥታ ስርጭት ላይ የመዝገብ አዝራሩን መታ ያድርጉ view to start/stop manual recording.
- የክስተት ቀረጻ፡ The camera automatically records when motion is detected. These recordings are stored on the installed microSD card (if any) or cloud storage (subscription may be required).
- መልሶ ማጫወት፡ መዳረሻ ተመዝግቧል footage through the "Playback" or "History" section in the app.
6.3 የእንቅስቃሴ ማወቂያ እና ማንቂያዎች
Configure motion detection sensitivity and areas within the app settings. When motion is detected, the camera can send push notifications to your phone and trigger recording. The PIR sensor has a detection range of 6-12 meters.
6.4 Floodlight Control
The floodlight can be controlled manually via the app or set to activate automatically upon motion detection during specific times or low-light conditions. Adjust brightness and duration settings in the app.
6.5 ባለ ሁለት መንገድ ኦዲዮ
Use the microphone and speaker icons in the live view to communicate with visitors or deter intruders. Press and hold the microphone icon to speak, and release to listen.
6.6 የምሽት ራዕይ
The camera features infrared (IR) night vision for clear black-and-white video in low-light conditions and can also utilize the floodlight for full-color night vision when activated. The night vision range is up to 12 meters.
7. ጥገና
7.1 ጽዳት
Wipe the camera lens and floodlight panel with a soft, damp አቧራ እና ቆሻሻ ለማስወገድ ጨርቅ. ኃይለኛ ኬሚካሎችን ወይም ሻካራ ማጽጃዎችን አይጠቀሙ.
7.2 የጽኑ ዝማኔዎች
Periodically check the app for available firmware updates. Keeping your camera's firmware up-to-date ensures optimal performance and security features.
7.3 የማከማቻ አስተዳደር
If using a microSD card, regularly check its status in the app. Format the card periodically to maintain performance. Back up important recordings before formatting.
8. መላ መፈለግ
| ችግር | ሊሆን የሚችል መፍትሄ |
|---|---|
| ካሜራ እየበራ አይደለም። | Check power adapter connection and ensure the outlet is functional. |
| ከWi-Fi ጋር መገናኘት አልተቻለም። | Ensure the camera is within Wi-Fi range. Verify Wi-Fi password. Try resetting the camera and router. |
| ደካማ የቪዲዮ ጥራት። | Check Wi-Fi signal strength. Clean the camera lens. Ensure sufficient lighting. |
| እንቅስቃሴን ማወቂያ አይሰራም። | Adjust motion detection sensitivity and area settings in the app. Ensure there are no obstructions. |
| Floodlight not activating. | Check floodlight settings in the app. Ensure it's set to activate on motion or during low light. |
9. ዝርዝሮች
| ባህሪ | ዝርዝር |
|---|---|
| የሞዴል ቁጥር | CP-F42A |
| ጥራት | 4MP (Effective Still Resolution: 4 MP) |
| የቪዲዮ መጭመቂያ | H.265, MPEG |
| Viewማእዘን | 110 ዲግሪዎች |
| PIR ርቀት | 6-12 ሜትር |
| ገመድ አልባ ቴክኖሎጂ | ዋይ ፋይ |
| የምሽት ራዕይ ክልል | 12 Meters (Infrared, Night Color) |
| የፍሬም መጠን | በሰከንድ 20 ፍሬሞች |
| የጨረር ማጉላት | 3x |
| የአለም አቀፍ ጥበቃ ደረጃ | IP54 |
| የማንቂያ ዓይነት | እንቅስቃሴ ብቻ |
| የኃይል ምንጭ | ባለገመድ ኤሌክትሪክ |
| የተካተቱ አካላት | አስማሚ |
| ልኬቶች (L x W x H) | 20 x 12 x 10 ሴንቲሜትር |
| የእቃው ክብደት | 630 ግ |
| የቤት ውስጥ / የውጭ አጠቃቀም | ከቤት ውጭ |
| የፎቶ ዳሳሽ ቴክኖሎጂ | CMOS |
| የሚመከር አጠቃቀሞች | የቤት ደህንነት፣ የሌሊት እይታ |
10. ዋስትና እና ድጋፍ
For warranty information and technical support, please refer to the official CP PLUS webጣቢያ ወይም የደንበኛ አገልግሎታቸውን ያነጋግሩ። ለዋስትና ጥያቄዎች የግዢ ደረሰኝዎን እንደ ግዢ ማረጋገጫ ያቆዩት።
CP PLUS Official Webጣቢያ፡ www.cpplusworld.com


